
Installing WordPress locally is mostly meant for the purpose of developing your site. It helps you to examine the newly added WordPress features, learn how to develop and create websites with WordPress before transferring them to the live server. In other words, establishing a WordPress site locally will give you an impeccable testing ground for website development since the local WordPress site can’t be accessed by other people.
Installing a WordPress locally on your PC doesn’t require a domain name and web hosting as it is needed only if you want to make your website available for the public.
Have you ever thought of building a website without buying a domain name and hosting provider? Here is the solution. Installing a WordPress locally on windows doesn’t require a domain name and web hosting as it is needed only if you want to make your website available for the public. i.e., if you install WordPress locally on a Computer, then the only person who can view that site is you.
The main reasons to create WordPress sites locally are:
- To learn WordPress
- To make some uncertain changes so that you can check them on your local site before changing it in the live site
- To test the functionality of some themes or plugins before installing them on the live site.
Also read: Understanding the Working of WordPress
Now getting to the installation process, WordPress cannot be installed straight on to your computer. For that, first, you need to install a web server. This article teaches you how to Install WordPress on a Windows Computer Using Bitnami localhost webserver.
There are plenty of free solutions that help you install WordPress on a Windows Computer or get WordPress set up on your laptop within a few minutes. Among them, Bitnami is the easiest way to Install WordPress on a Windows Computer, especially for learners.
Installing Bitnami to your system is an effortless task that doesn’t take much of your time if you go by the following steps.
Step 1
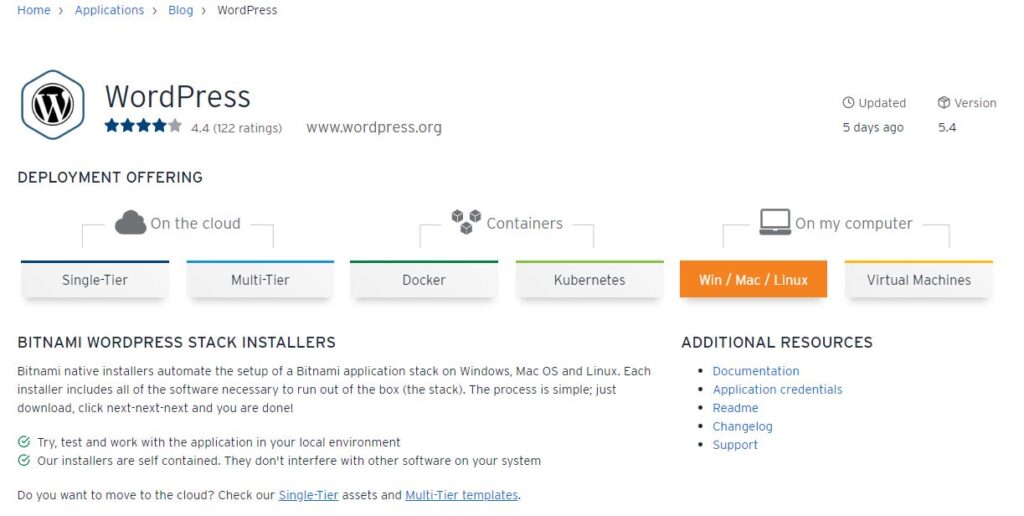
To begin with, All you have to do is visit the Bitnami WordPress page where you can download the Bitnami software. When the page appears, select the Win/Mac/Linux option.
Step 2
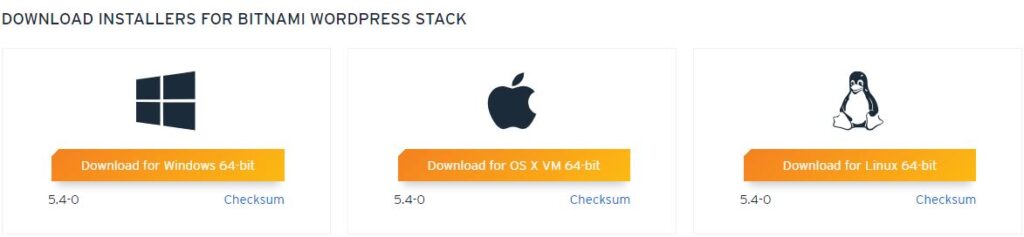
After that, just scroll down the page and click on the ‘Download for Windows’ option.
Step 3
Next, you will get a pop-up message from Bitnami. Select ‘No thanks’ and start your download.
Step 4
When the download is complete, you can start the installation process. When your installation begins, you will get a pop-up message from Bitnami for choosing the installation Language. Select the language you prefer and click ‘OK’.
Step 5
A setup window will appear to start your installation. Click “Next” till you arrive at the window for creating an account for the local WordPress website.
Step 6
Fill up the login details for your local WordPress website here. Head to the ‘Finish’ button and complete the installation process.
Step 7
After this, a page will appear where you have to select ‘Access WordPress’ to reach your local WordPress site.
Now you are free to access your local site anytime by typing localhost/WordPress in the URL bar. Similarly, if you have to reach the dashboard of your website, type localhost/WordPress/wp-admin in the URL bar and press the ‘Enter’ key. Provide the username and password you have set while installing Bitnami. You are now logged into the Bitnami WordPress dashboard inside your laptop or PC.
By all means your Bitnami WordPress site is only inside your own computer and nobody else can access it. This makes it an ideal platform for practicing and learning WordPress. You can also enhance your site-building skills without the pressure of a live website. After creating your local website, don’t forget to log out of WordPress and close your Bitnami server.
Also read: 6 Free Tools to Install WordPress Locally
So, this is the whole process of building a personal testing site on a localhost environment. This process will hardly require 5-10 minutes based on your efficiency. Once you are finished building your site locally, the next process is to move it from your computer to a live site and share your creation with the world.
Some Frequently Asked Questions
Why install WordPress locally?
Installing WordPress locally on your computer provides you a testing environment that doesn’t affect your live website. Beginners can also install WordPress locally to learn WordPress, test new WordPress themes and plugins, and experiment without affecting a live website.
What is WordPress?
It is the easiest way to create a website even if you don’t have any coding knowledge. It is free, easy to use and open-source.
Why must I study WordPress?
WordPress is the most popular CMS powering over 43% of websites on the internet today. It is flexible, SEO-friendly and is the easiest way to create a website. It is also great for your career as there are a lot more jobs in WordPress now than a few years ago.