


Are you looking for an easy way to create a custom Gutenberg block for your WordPress site? Be at ease. We are here to help you. Gutenberg has changed the way users create content within WordPress and the way developers build WordPress plugins and themes. In this tutorial, you are going to learn how you can create custom blocks in Gutenberg with minimum coding. But before that, we will discuss some basics about Gutenberg.
Gutenberg
Gutenberg is a block-based editor that is available from the WordPress 5.0 version onwards. It is WordPress’ own response to the page builder plugins used by so many websites nowadays. Instead of installing third-party plugins and messing around with shortcodes, Gutenberg helps WordPress users to create a much wider array of layouts by clicking a few buttons in the main editor. It has a decent selection of blocks you can use across your pages and posts to build the layout you want.
Blocks are nothing but a great tool for building engaging content. With blocks, you can insert, reconstruct, and style multimedia content with very little technical knowledge. i.e, instead of using custom code, you can add a block and focus on your content.
In WordPress, it’s also possible to build your own custom blocks. For that, you should know at least a bit about coding, but the process itself is somewhat straightforward. Though the functionality of each block is different, adding and editing them usually works much the same. Plus, creating custom blocks for functionality you want to reuse can save you a lot of time in the long run!
When it comes to creating custom blocks for Gutenberg you mostly have two choices; code it from scratch or use a plugin. To create a custom block by coding is quite difficult and requires more coding knowledge as you have to register your blocks and customise them via JavaScript. In this tutorial, we are going to take the easier route and use a plugin.
The benefit of using a plugin is that we can create blocks using a visual interface and that we don’t need to worry about registering the blocks with JavaScript. In fact, we won’t need to write any JavaScript code at all. So let’s move on to the steps for creating a custom block in Gutenberg.
Step 1: Install the Lazy Block Plugin
If you’d rather not deal with any code at all, Lazy Blocks is the right pick for you. This plugin enables you to create custom blocks using a list of pre-built elements, including text, password, and image fields, as well as colour and date pickers, among others. Visit the Plugins > Add New page inside your WordPress admin area. Search for Lazy block plugin and install it. Click on the activate button to start using that plugin on your WordPress site.
Step 2: Create a new block
For the sake of this tutorial, here, we are going to create an author box where you can upload author image, add Author name and a short description. For this, you need to know some basics of HTML and CSS.
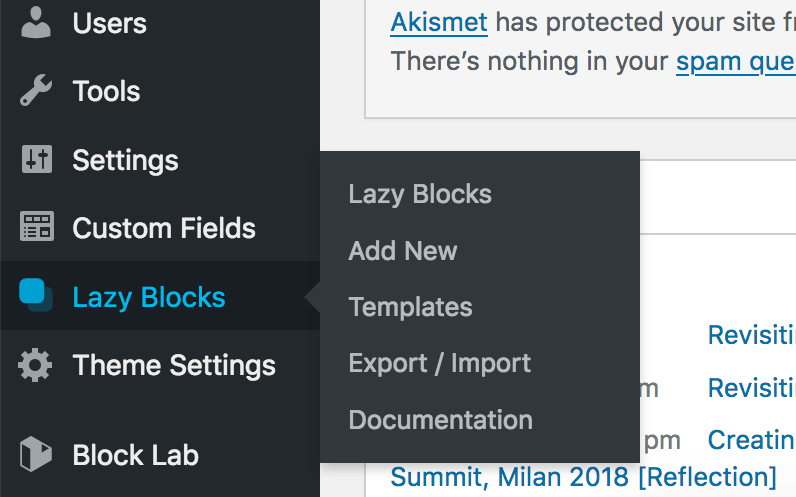
First, select the Lazy Block > Add New from the left sidebar of your admin panel.
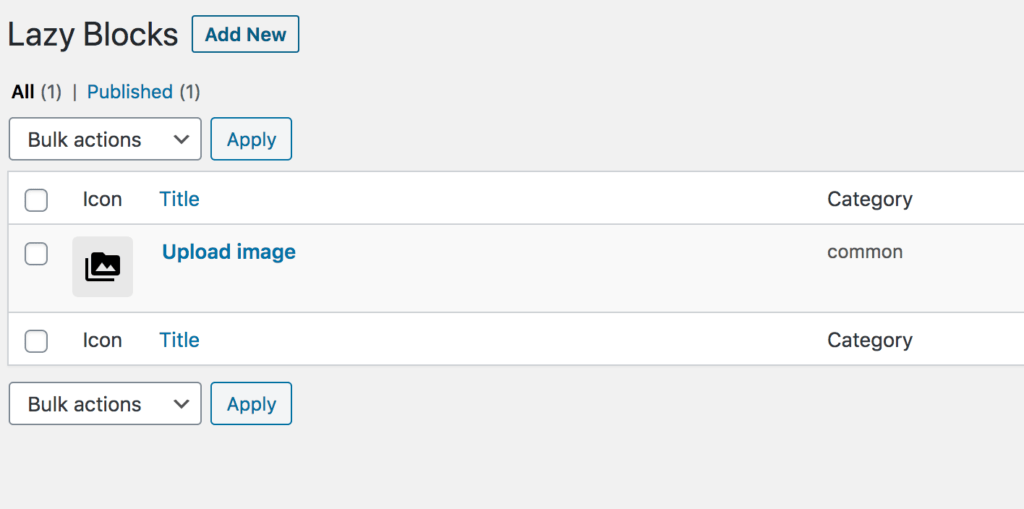
On this page, you need to give a name and icon to your block. You can write any title of your choice in the “Enter block name here” textbox and choose an icon from the right side. You can also select a block category from the Category dropdown box.
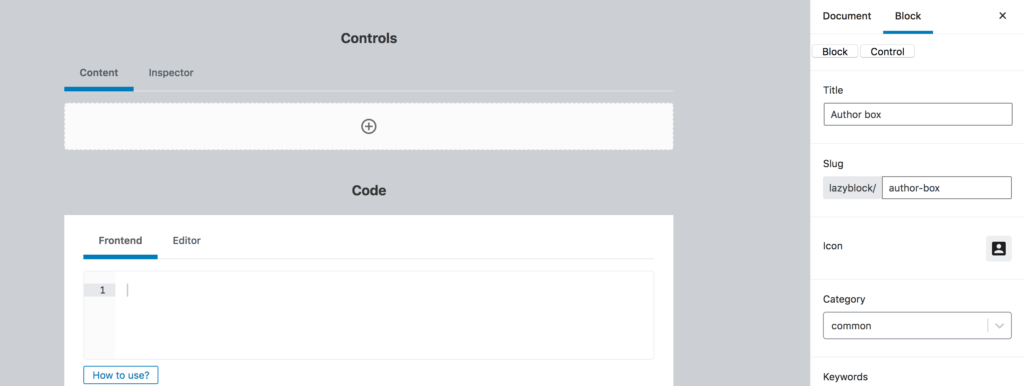
Step 3: Add controls to the block
Controls allow us to specify dynamic settings for a block, and it’s almost necessary for all the blocks to have controls. You can add different types of controls like text, numbers, email, URL, colour, image, checkbox, radio buttons, and much more.
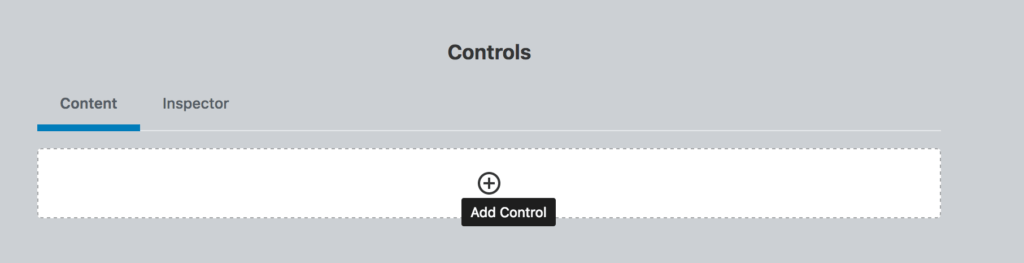
Since here we are building an author box, the required fields are image, name and a description. For that, go to the Content tab under the Controls section and click on the + icon to add the controls. This will open up some options for the field. Let’s take a look at each of them.
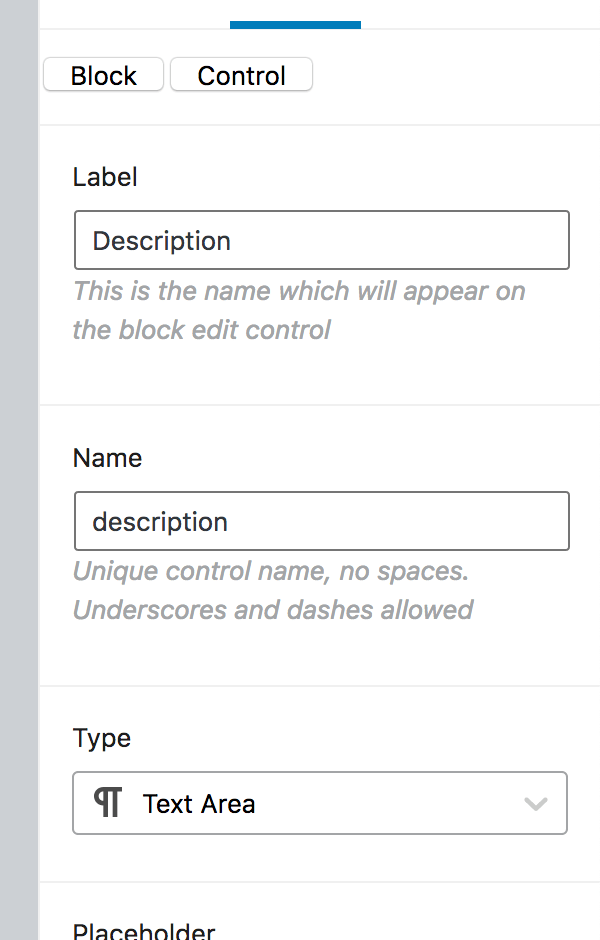
Field Label: You can use any name of your choice for the field label. Add the label and choose text control from the right side.
Field Name: The field name is created automatically based on the field label.
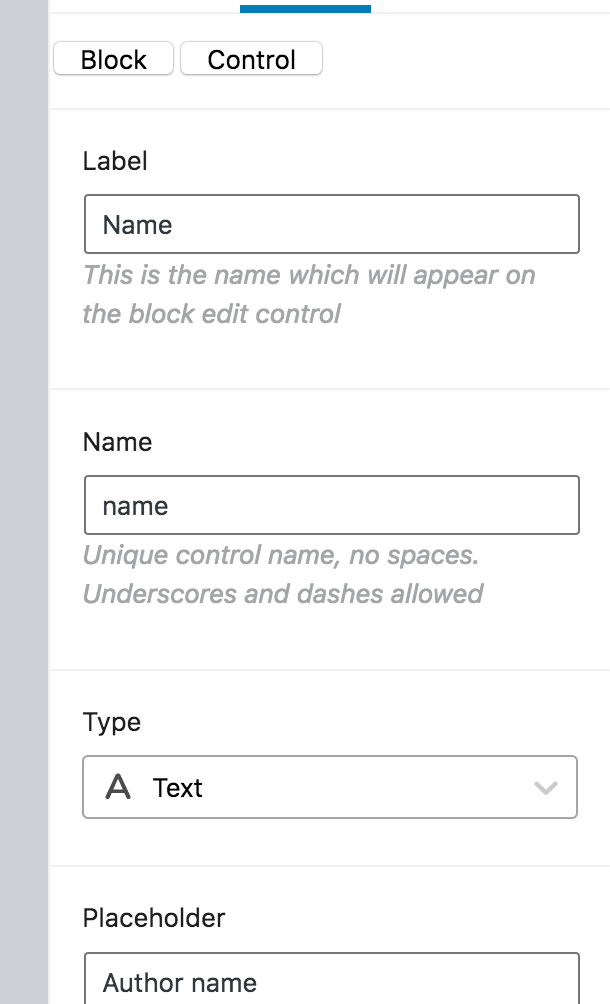
Field Type: Here you can select the type of field. If you want your first field to be an image, select Image from the dropdown menu.
Field Location: You can decide whether you want to add the field to the editor or the inspector.
Help Text: You can insert some text to describe the field. This is not required if you’re creating this block for your personal use.
Step 4: Create a Block Template
Now we need to write the actual codes based on the design to make the block work. So, let’s enter upon the coding side.
1. You can use either different code or the same code for both the front end and back end. Under the Controls section, go to the Frontend tab and add the following codes.
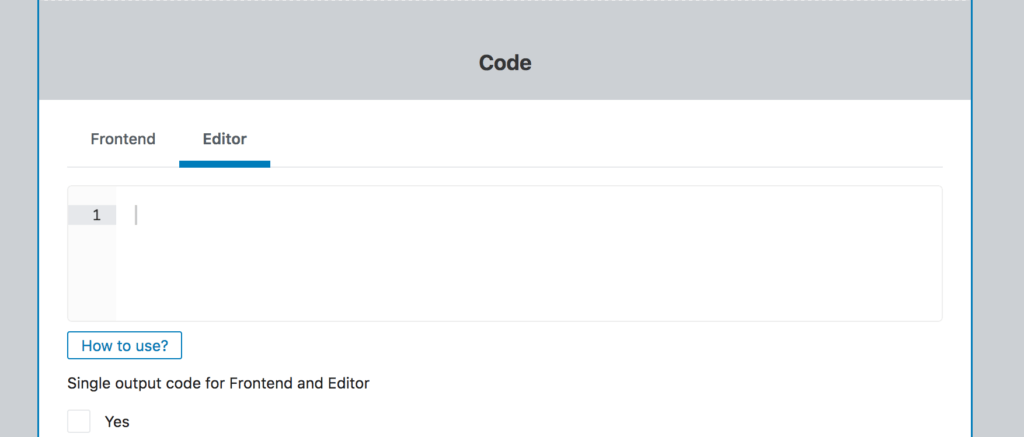
Note that the controls names must be wrapped in two curly brackets. eg: {{control-name}} then added inside the following code. We recommend that you read the controls documentation before moving on.
2. Now we can add the HTML code. To get image we have to use <img src=”{{control_name.url}}” alt=”{{control_name.alt}}”>. If you have any uncertainty, go through the controls image documentation.
The control names of all our required fields are as follows:
Image -> image
Name -> name
Description -> description
In our case, the HTML + Handlebars code to display:
- the image is:
<img src=”{{image.url}}” alt=”{{image.alt}}”>
- For name:
<h2>{{name}}</h2>
- Description
<p>{{description}}</p>
Here is the complete HTML example code:
<div class="author-box">
	<div class="author-image">
		<img src="{{image.url}}" alt="{{image.alt}}">
	</div>
	<div class="author-info">
		<h2>{{name}}</h2>
		<p>{{description}}</p>
	</div>
</div>
Add this code in the code section and choose Output method as HTML + Handlebars and update. Now for the frontend code, add your CSS code in customizer Additional CSS field and insert the CSS in <style> tag along with HTML’s in the Editor code.
Example:
.author-box {
	border: 1px solid #ccc;
	border-radius: 6px;
	padding: 20px;
	margin-bottom: 50px;
}

.author-image {
	float: left;
	margin-right: 30px;
}

.author-image img {
	border-radius: 50%;
	max-width: 100px;
	height: auto;
}

.author-info {
	overflow: hidden;
}

.author-info h2 {
	margin: 0 0 20px;
}

.author-info p {
	margin-bottom: 0;
}
Frontend code
<div class="author-box">
	<div class="author-image">
		<img src="{{image.url}}" alt="{{image.alt}}">
	</div>
	<div class="author-info">
		<h2>{{name}}</h2>
		<p>{{description}}</p>
	</div>
</div>
+ CSS in customizer
Editor code
<div class="author-box">
	<div class="author-image">
		<img src="{{image.url}}" alt="{{image.alt}}">
	</div>
	<div class="author-info">
		<h2>{{name}}</h2>
		<p>{{description}}</p>
	</div>
</div>
<style>
	.author-box {
		border: 1px solid #ccc;
		border-radius: 6px;
		padding: 20px;
		margin-bottom: 50px;
	}

	.author-image {
		float: left;
		margin-right: 30px;
	}

	.author-image img {
		border-radius: 50%;
		max-width: 100px;
		height: auto;
	}

	.author-info {
		overflow: hidden;
	}

	.author-info h2 {
		margin: 0 0 20px;
	}

	.author-info p {
		margin-bottom: 0;
	}

</style>
Now we can add this block in a page/post. Add/Edit post/page and click on add new block option and you can find the author box lock in the list. You may add different texts, names, avatars and icon backgrounds to the block. All this can also be added in different layouts like columns.
Conclusion
In this blog post, we easily created a custom Gutenberg block with Lazy Blocks without any difficulty of creating a separate plugin, child theme or other development obstacles. The ability to design custom block types is very cool and opens a lot of possibilities for content customisation. This Lazy Blocks plugin will definitely help actualize your ideas about custom Gutenberg blocks in no time.