


Developing a WordPress website or even a plugin is an art in itself. Like an art form, countless hours are dedicated to perfecting it. From the hundreds of lines of codes to the optimization and future releases, a lot of things happen in the background. Like any art form, the final product or the desired result takes some time and there are a lot of areas that can go wrong. We all need a space to perfect our final product. This is where the WordPress staging website comes into play. Consider the staging atmosphere as our little playground. Here we are free to make mistakes, understand the areas to improve and hone them to utmost perfection.
What Exactly is a WordPress Staging Website?
A staging WordPress website is a mirror or replica of our website. With all the same functionalities and other aspects included. However, the staging WordPress website is only visible to the owner and not available to the public. With the staging environment we are free to play around and test new plugins, and site features, without impacting the core website. Consider the staging environment as a rehearsal area. If anything happens and causes a breakdown, it will never affect the website accessible to the general public.
The Core Benefits of Having a WordPress Staging Site
There are countless benefits to deploying a WordPress Staging Environment, the main ones are:
- Perfect testing ground to try out new plugins and see how they perform. If anything goes wrong, the core website will be unaffected.
- Test out new features and see how they interact.
- Troubleshoot the relevant issues without taking down the live website.
- Roll out updates and see how they perform.
The Downsides of Setting up a WordPress Staging Site
There are downsides to using a WordPress staging site, but the benefits outweigh the drawbacks. Some of the drawbacks include:
- Not all hosting providers support staging services included in the basic package. Sometimes you have to spend extra to get the staging site feature.
- Manually creating the staging site is a lengthy procedure and arduous.
- Transferring changes from the staging WordPress site to the live website can take some time. It all depends on how many changes were made and how complicated they were.
Also read: How to Add Custom CSS to WordPress Easily
How to Create a WordPress Staging Site
Now, that we know what a staging WordPress site is and the benefits, it’s time to learn how to make one. There are mainly three ways to deploy a staging environment.
- Create a WordPress staging site with the help of a plugin
- Develop a staging site with the Web Host itself
- Creating a staging site manually
For this guide, we will be looking only at how to create a staging site with the help of a plugin and with the web host.
1. Create a WordPress Staging Site With The Help of a Plugin
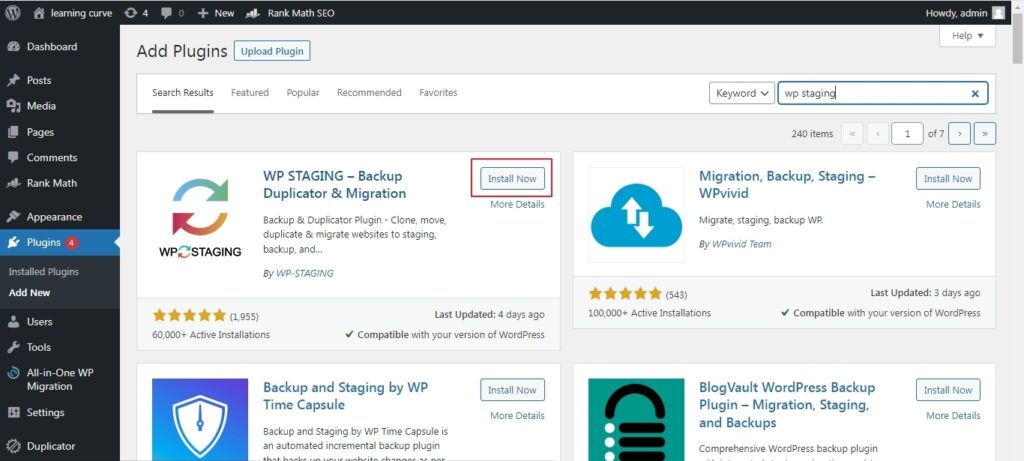
There are several staging site plugins available, but for now, we will look at the most common plugin that is easy to use.
WP Staging Backup Duplicator and Migration Plugin
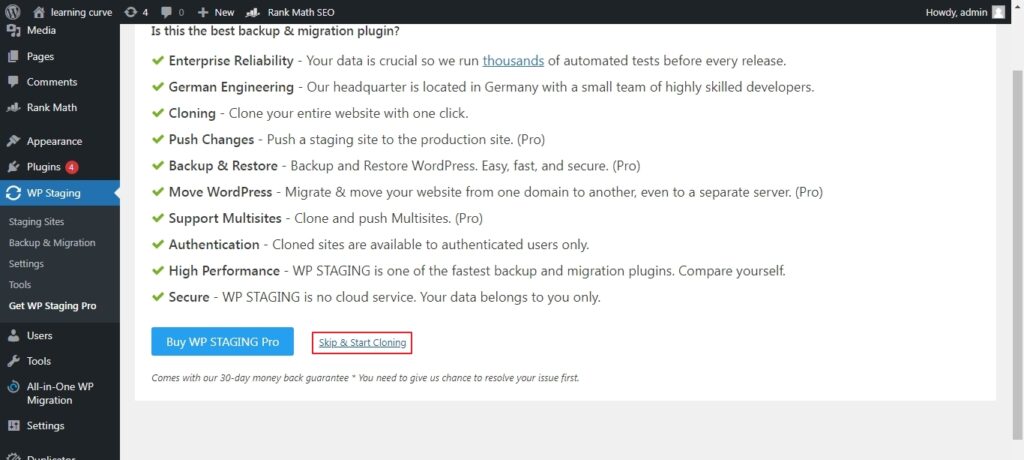
The most straightforward way to create a WordPress staging site and no complex steps are involved. There is a free version as well as a paid version. The limitation with the free version is that the plugin won’t allow us to transfer any sort of changes that we make on the staging site to the main site. To copy changes from the staging site to the main site, one needs to go with the premium plan options. The steps to use the plugin are as follows:
First, install the plugin from the repository and activate it.
Then select WP Staging from the left side menu.
Click on create a new staging site
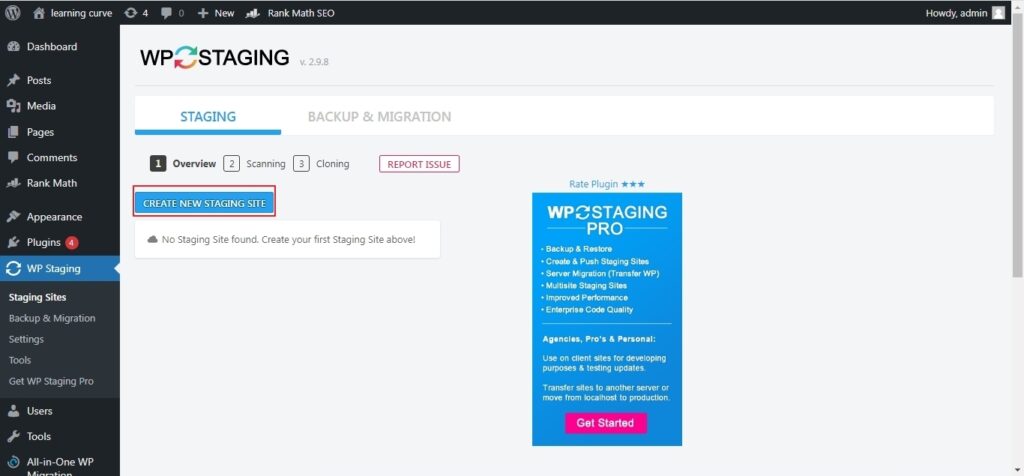
Give a name to the staging site. We can also choose which all files and databases to clone from the submenus.

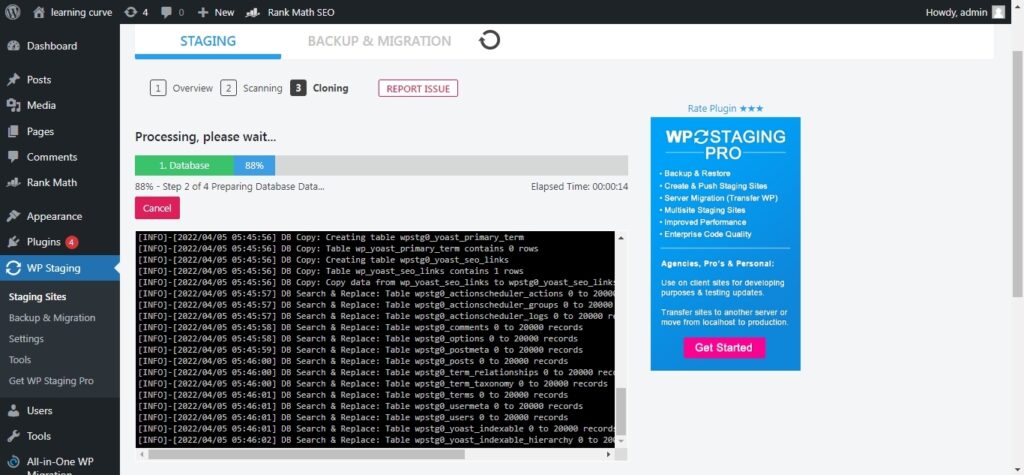
It might take some time to create the staging site, the process looks like this.
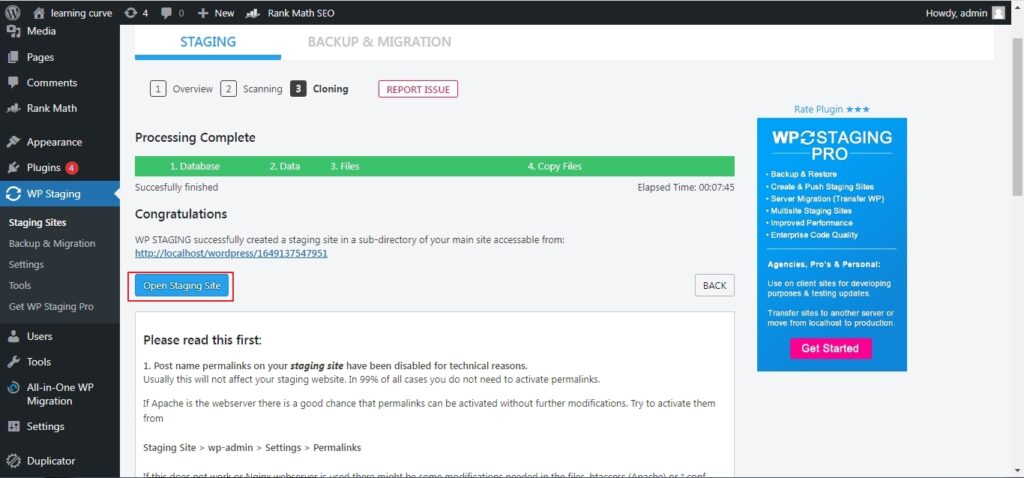
After cloning is complete, access the staging site following the on-screen instructions.
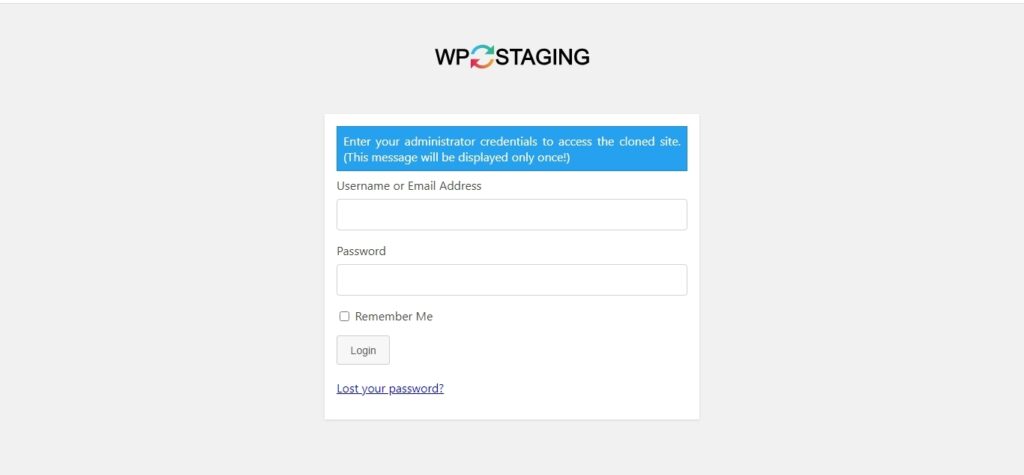
Login once again using the default username and login.
Once you are in the staging site, an orange bar above the top will remind us, that we are using the staging WordPress site.
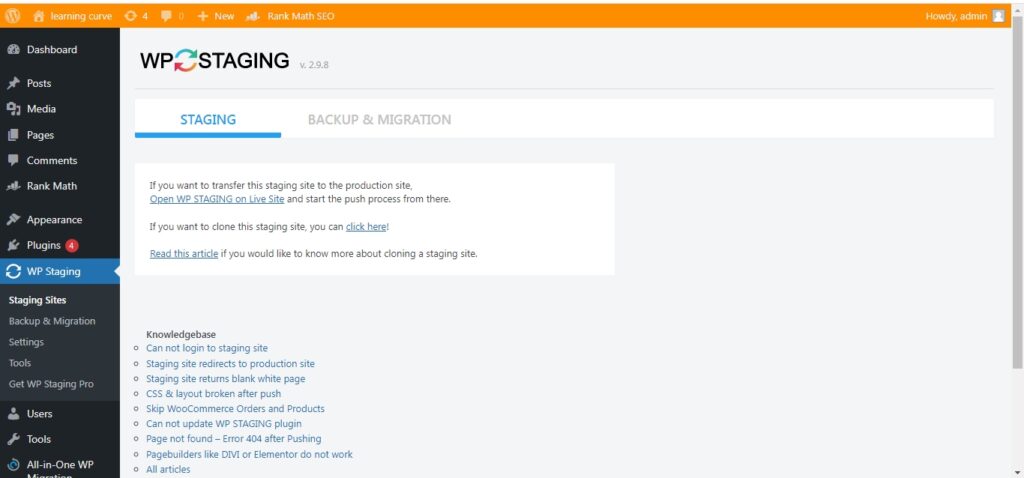
That’s it. You are now officially on the WordPress staging site. Now play around with new plugins and site implementation without worrying about breaking the core site.
2. Create a WordPress Staging Site With the Web Host itself
Almost all the hosting companies do provide staging services. Some web hosting services only provide the staging site option with a higher plan, not the base plan. The steps on how to create a staging site are similar. Now, since we can’t cover all the hosting providers out there, we will cover some of the leading hosting service providers such as Bluehost, Flywheel, and SiteGround.
Bluehost
Bluehost is one of the leading hosting service providers out there single-handedly hosting well over 2 million domains. The steps to create a WordPress staging site on Bluehost is straight forward. Let’s look at how to create one:
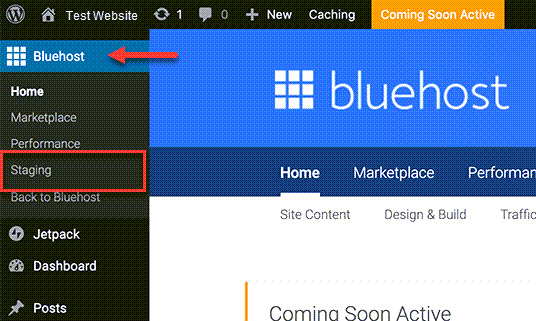
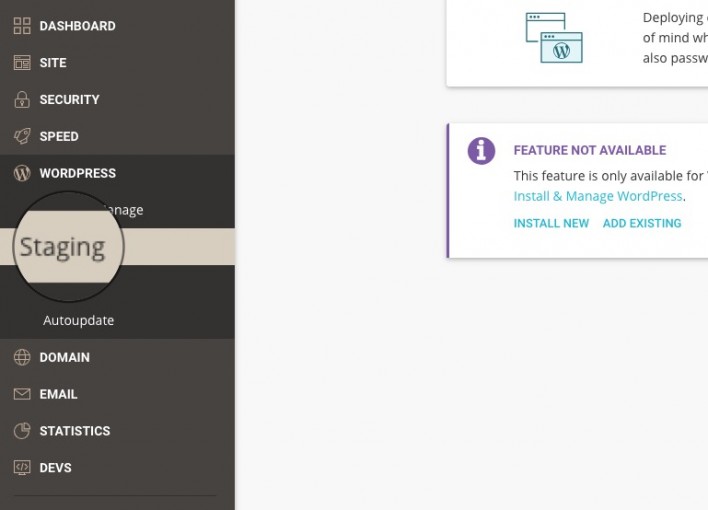
First of all, login into the WordPress Admin Space and choose Bluehost and select the staging option.
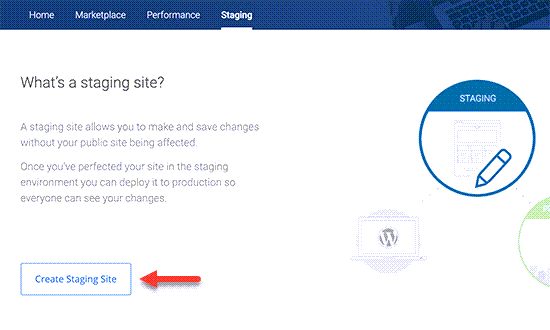
Then click on Create Staging Site option.
Wait for the staging process to complete and select Go To Staging Site.
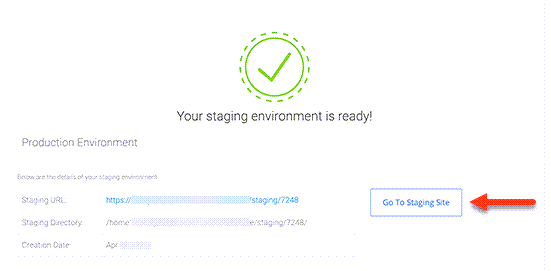
Once in the staging WordPress site, a red button on top will indicate that we are in the staging environment.

Bluehost also provides a feature to deploy the changes from the staging site to the main website. Just access the Staging menu> Select Deployment. Choose whether to deploy Files, Databases or both.
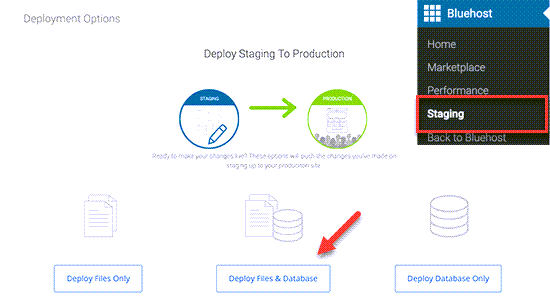
- Select any one of them and press Yes! Let’s Deploy. The time will vary depending on the size of the website.

That’s it, you are done. All the changes will now reflect on the live website.
SiteGround
Another big player in the web hosting field is SiteGround. They started their journey in 2004 and have come a long way. The staging option provided by them is also straightforward, with no complex steps. To start a staging WordPress site on SiteGround, the steps are as follows:
Access the staging option from the Site Tools from the main dashboard.
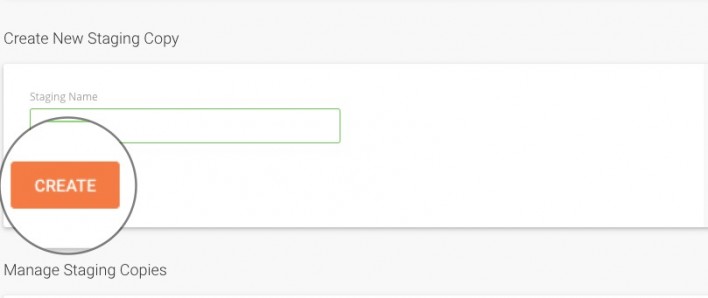
Select the domain and wait for Siteground to detect it. Then give a name to the staging site and click Create.
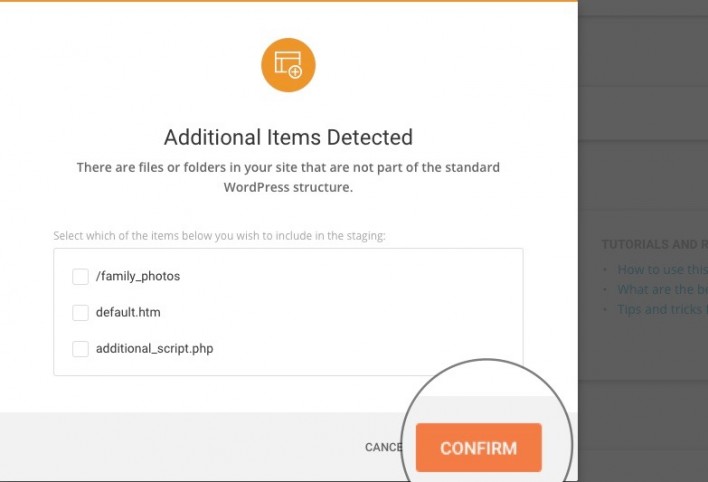
SiteGround will detect any additional files and will present an option to select or deselect them. Such files normally won’t be a part of the WordPress directory. Click Confirm and that is it.
One can access and manage the staging site from SiteTools > WordPress > Staging > Manage Staging Copies. Click on the staging site name and we are good to go.
Here again, it is possible to publish changes directly from the staging WordPress site to the live site. Go to Manage Staging Sites, then select the three-dot menu next to the staging site and choose either Full Deploy or Custom Deploy. Custom deploy will show all the changes that we made to the staging site and we can choose what we want to deploy to the live site.
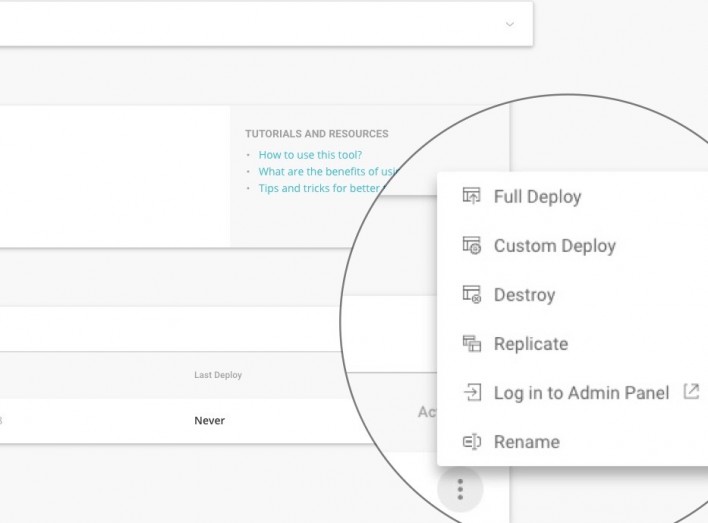
- Full Deploy- will apply all the changes we made on the staging site to the live site.
- Custom Deploy- We can choose what all we want to deploy and opt-out of the rest.
- Destroy- will erase the staging copy.
- Replicate- will make a copy of the staging site. This feature is handy if one wants to test new features without reverting all the changes on the first staging site.
Flywheel
Flywheel is managed WordPress hosting, that also provides the staging environment setup. Only four steps are involved to create a staging website.
First login to your Flywheel and select the Advanced tab.
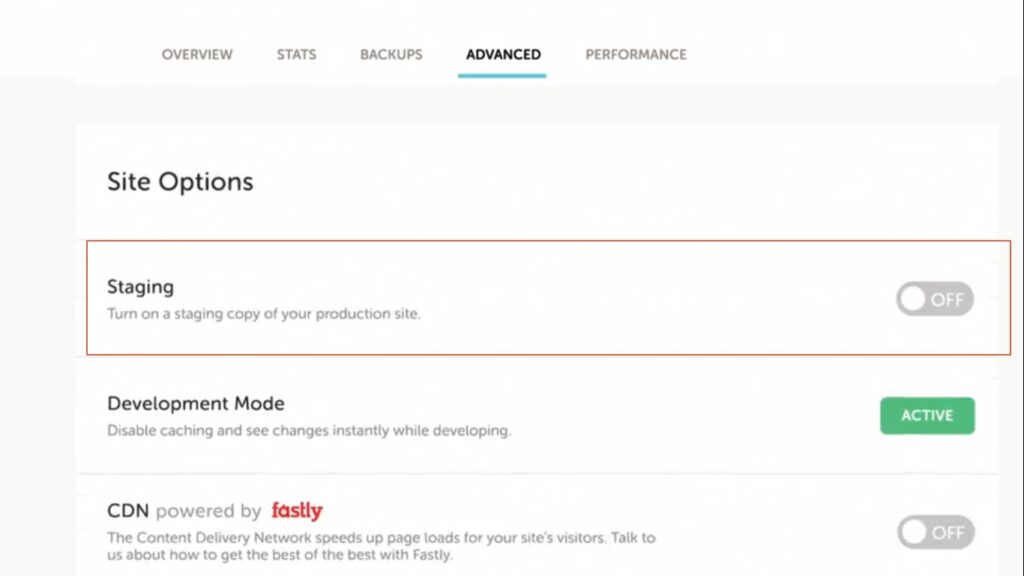
Then select the staging option and toggle it on.
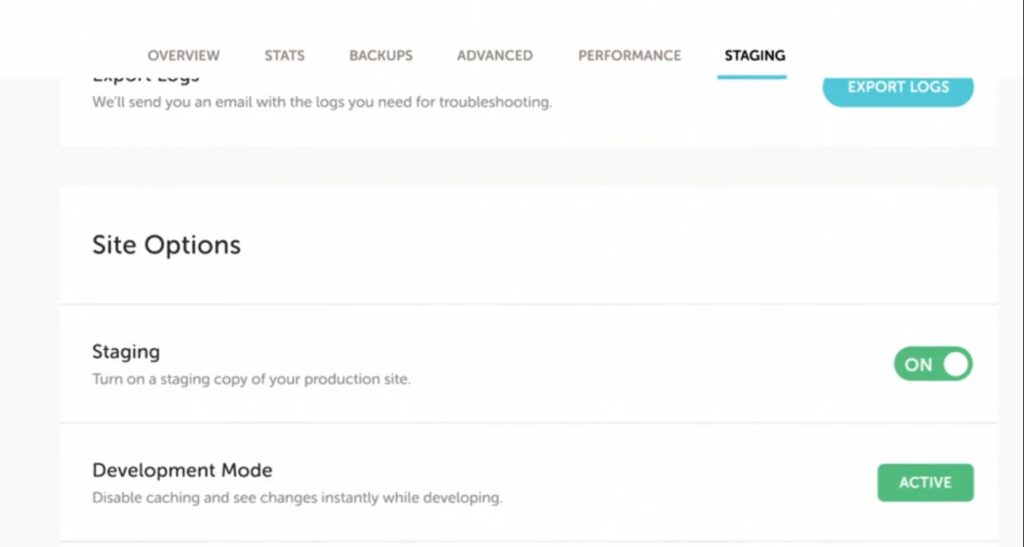
Turn on the staging option and wait for it to complete. A new menu for staging will appear now, with all the staging-related options.
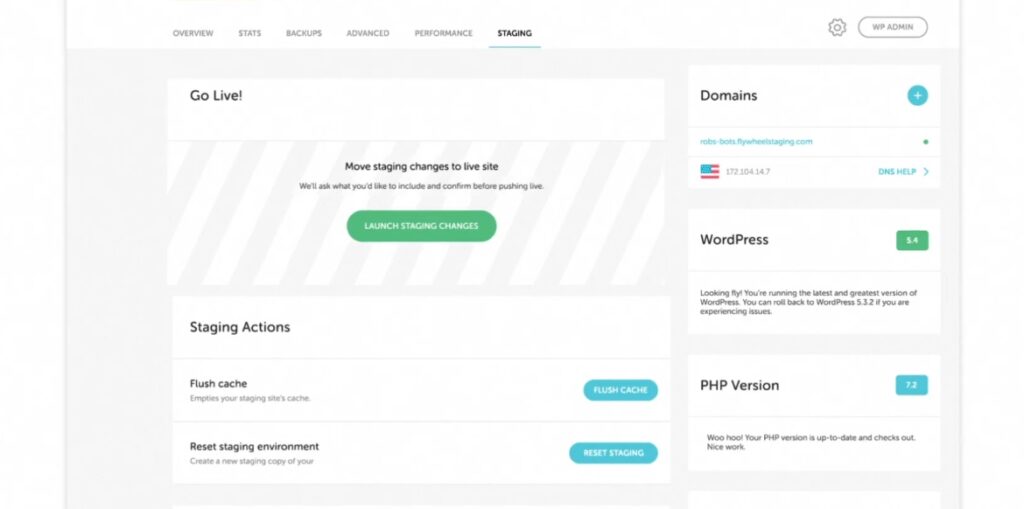
Publishing changes from the staging site to the live website is possible with a click. Go to the staging menu and select Move Staging Changes to the Live Site.
Wrapping up
Having a staging website is always useful, as we can tinker around without affecting the live WordPress website. A staging environment is always helpful during the developing and trial run stage of the plugins and other website features. Developers and admins can see how each aspect works; if there is any conflict, they can fix it without taking the live website down.
Disclosure: This post may contain affiliate links, which means we may receive a commission if you click a link and purchase something that we shared. Read more about Affiliate disclosure here.
It was such a great article which was on the environment for wordpress. To set up a staging environment for WordPress, you can follow these general steps:
1.Choose a Hosting Solution
2.Duplicate Your WordPress Site
3.Update Site URLs
4.Secure the Staging Environment
5.Test and Modify
6.Sync Changes
7.Regular Maintenance
These are some points which I wanted to include in your article. Readers, If you want to develop your wordpress website, you can visit an IT company like Alakmalak technologies. They have 17+ years of experience in this field.