WordPress not sending emails is one of the most repeated issues faced by WordPress users. Many times, you may have noticed that you are not getting email notifications as expected, or your readers or customers have complained the same. If you are experiencing issues with WordPress failing to send emails such as sending forms or other communications, it’s usually due to problems with your WordPress hosting server configuration. In this article, we will show you how to fix this issue, so your website can send emails more reliably and bypass the spam folder.
Why You�??re Not Receiving Emails from Your WordPress Site?
As mentioned earlier, the most common reason for emails going missing is that your WordPress hosting server is not properly configured to use the PHP mail() function. Like many web applications, WordPress uses the PHP ()mail function to distribute email. On a correctly configured server, this feature should work flawlessly without the need for user configuration.
However, server hosts may place temporary or permanent restrictions on the use of PHP ()mail to reduce automated spam thus never making it to your inbox. i.e when WordPress wants to send emails, it calls on the email server in your WebHost using the PHP Mail function, but if this function is disabled by your web host, your requests to send emails will not even get to your mail server.
How To Solve WordPress not sending emails?
One of the best ways to rectify this issue is by using the SMTP (Simple Mail Transfer Protocol) for sending emails in WordPress. But make sure that your underlying SMTP server is configured properly. Unlike the PHP mail() function, SMTP uses proper authentication which leads to high email deliverability. When you have an SMTP server properly installed, WordPress would no longer need to send emails using your web host email server. Rather, the emails would go directly from WordPress to your SMTP server, thus removing the problem.
Additionally, since SMTP uses the PHPMailer Library instead of the PHP Mail function, your emails are much more likely to be correctly delivered and to avoid the spam folder. Thus WordPress not sending emails issue can be solved by installing an SMTP Server Plugin such as Gmail SMTP, WP Mail SMTP etc.
Installing Gmail SMTP Plugin
First, install and activate the Gmail SMTP plugin from the WordPress repository. If you don’t have any idea on how to install a plugin, see our step by step guide on how to install a WordPress plugin. Once the installation and activation are done you would be taken to the “Plugins” page with a message on top indicating your plugin has been activated.
Authorizing The Plugin To Send Using Your Gmail Account
In order to fix WordPress not sending emails, you need to authorize your SMTP plugin to send emails using your Gmail account. For this to work, you have to create a google web application and generate API keys. To authorize your WordPress installation to use Google’s email servers, you must create a set of secure credentials. First, open a new browser window/tab and visit console.developers.google.com. Log in with your newly created Gmail account details, or another Google account you intend to use. Though it may sound technical it is quite easy and straightforward.
On the “Register your application” page, select “Yes” for both items and click Agree and Continue. After this, just follow the below-mentioned steps.
- Click Go to credentials.
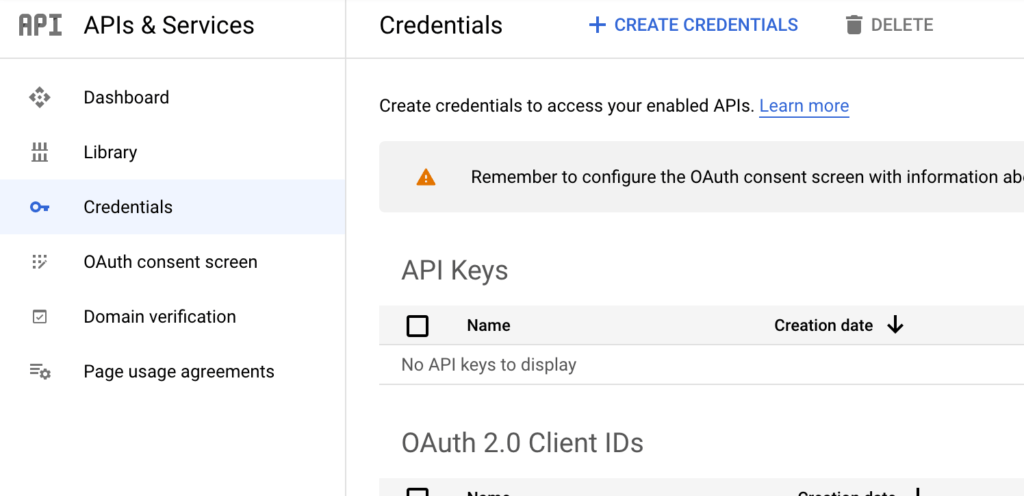
- On the “Add credentials” page, leave the API set to “Gmail API”, select “Web browser (Javascript)” as the place you would be having the API from, and choose “User data” as the type of data you would be accessing.
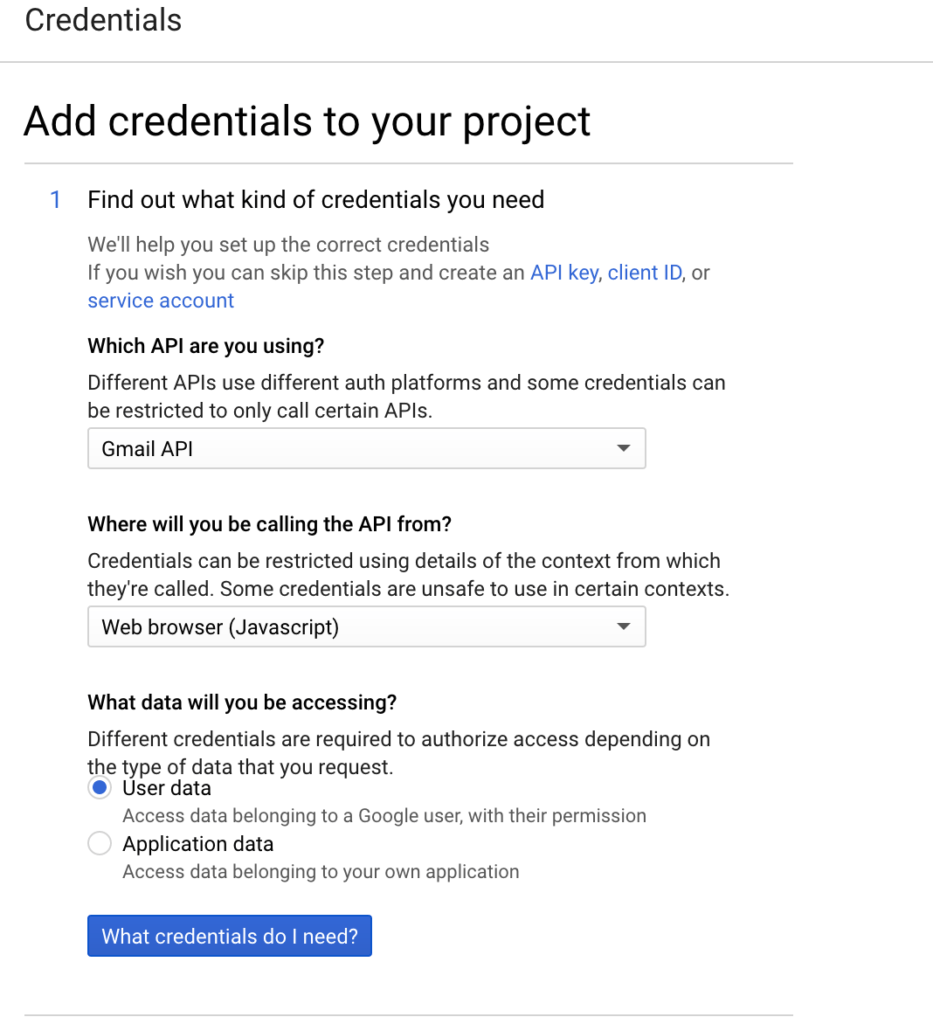
- After that, click What credentials do I need?
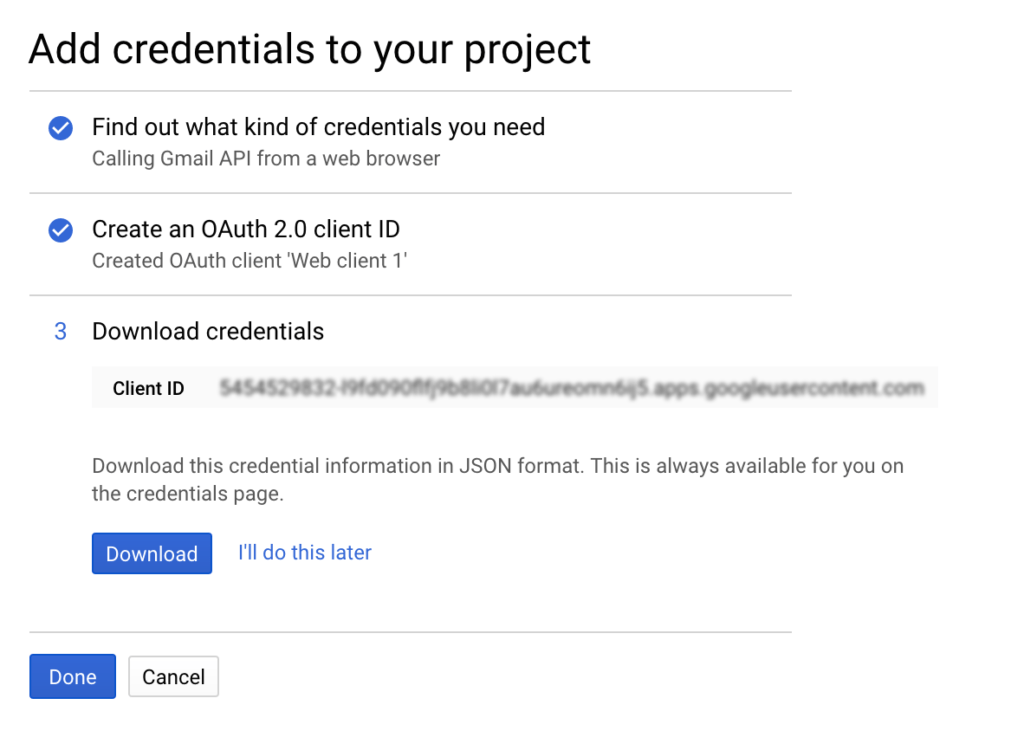
- Enter a name for your authorization client and enter your blog URL in the “Authorized Javascript origins” input box.
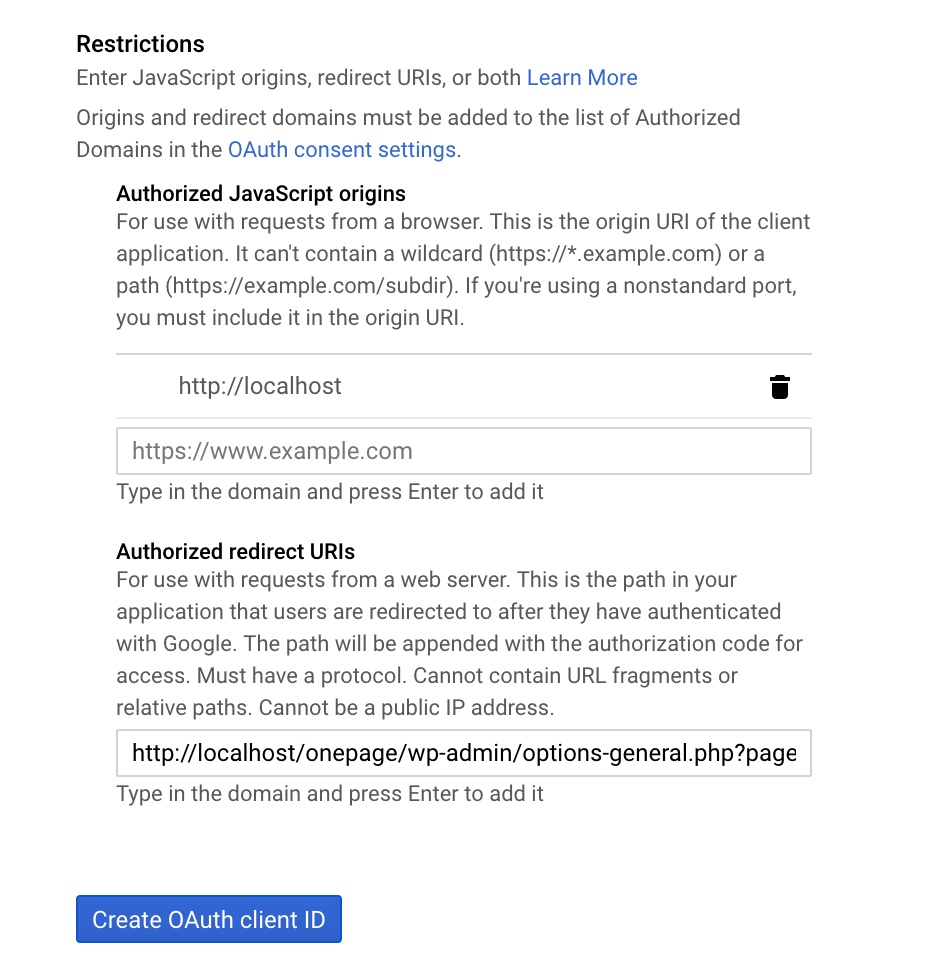
- Your “Authorized Redirect URI” is provided in your Gmail SMTP plugin page. Navigate to that page and copy-paste this redirect URI in your Gmail credential Page.
- Click Create Client ID.
- Leave the email address set to the one you want to use, and enter a product name. You can use any product name of your choice. Next, click Continue.
- In the final step, click Done. You will be taken to the credentials page.
Configuring WordPress to send emails using Gmail SMTP
- Click on the name of the credential you just created.
- In the next page, you will see your Client ID and Client Secret.
- Copy the “Client ID” and “Client Secret” into their corresponding input boxes in the Gmail SMTP plugin settings page.
- Next, enter the Gmail address you are using in the “OAuth Email Address” and “From Email Address” Input boxes.
- Enter your “From Name”, which is the name that would show when a person receives your message.
- In “Type of Encryption”, select TLS, and enter 587 in the “SMTP Port” input box.
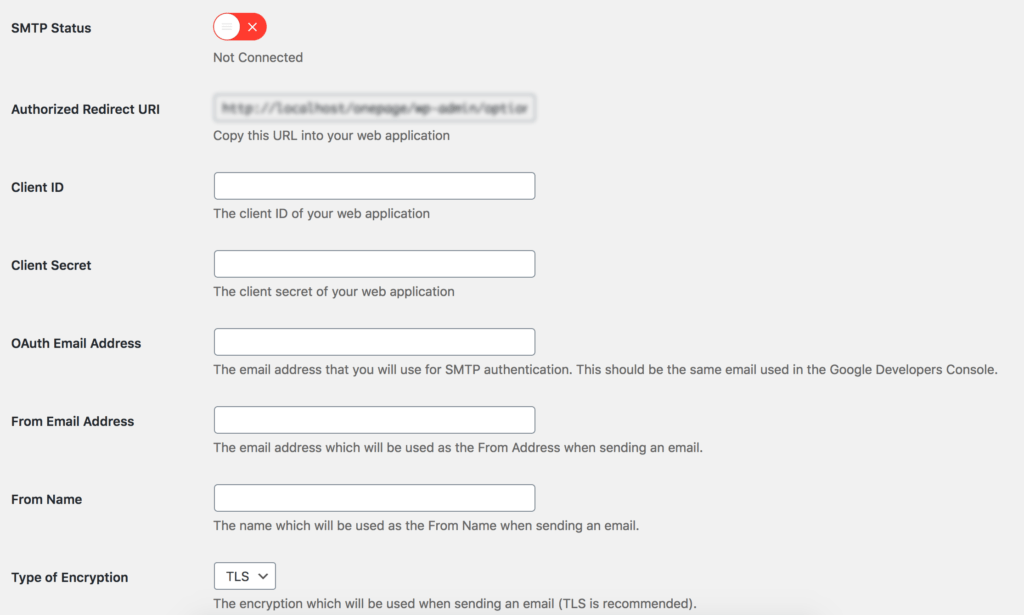
- If you do not use an SSL certificate on your server, tick the “Disable SSL Certificate Verification” box.
- Click Save Changes.
- After saving your settings, a “Grant Permission” button would appear. Click on it.
- In the authorization page, click Allow
- You would be taken back to your plugin settings page where you should see an “Access Granted Successfully” message at the top. Also, SMTP Status should now be “Connected”.
And that’s it! You have configured WordPress to send emails using Gmail SMTP.
Testing Your Gmail SMTP Plugin
In order to send a test email to see if it works, you have to do the following steps. Switch to the “Test Email” tab in your plugin. Next, fill out the “To”, “Subject”, and “Message” fields and click Send Email. You will be receiving the test email in your inbox, in which case your WordPress not sending emails issue is cleared out!
Conclusion
You can also whitelist the email address, use a safer email address and set up email authentication in order to prevent WordPress emails going to spam. We hope you’ve learned a lot about those annoying WordPress email issues today. Everyone hates email troubles as much as they hate spam, so every little bit helps. For more WordPress tips, keep it glued to the wp-content.co. Until next time!


