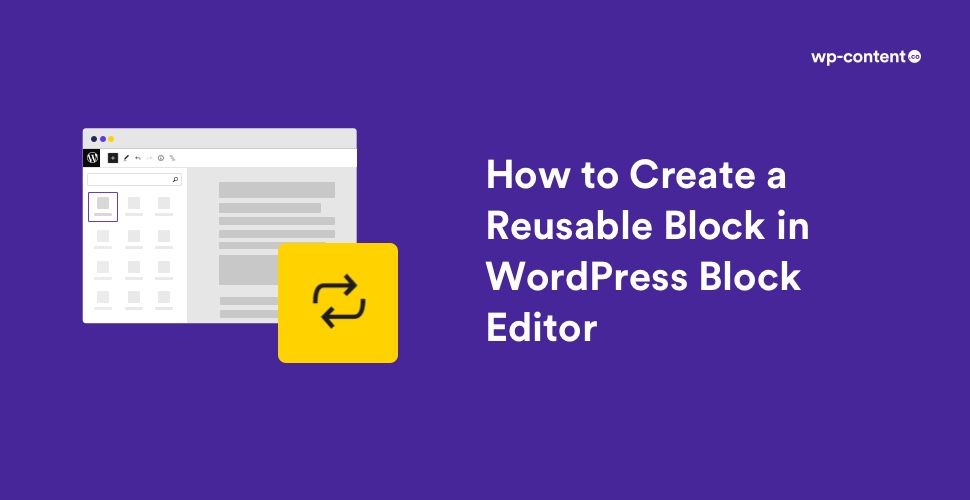


The WordPress block editor or Gutenberg was released at the end of 2018. The Gutenberg interface allows you to create your own kind of blocks which are called Reusable Blocks. With reusable blocks, you can save a content block and use them on other pages of your website. They are stored in their own Reusable category in the Search for Block interface.
In this article, we will show you how to easily create a reusable block in WordPress Block editor also known as Gutenberg. We will also show you how to add reusable blocks in your WordPress posts and export them to use on your other WordPress websites. So, let’s get started.
What is a reusable block?
A reusable block is a content block that can be saved in your library for later use. Reusable blocks were introduced in WordPress 5.0. Before that, WordPress had no such feature allowing you to save parts of your content.
Many bloggers often add the same content snippets in multiple articles such as call-to-actions at the end of the blog post or links to follow the blog in social media. Most of them just save their content snippets as text files on their computers and then copy-paste them when needed. This is where reusable blocks become useful. Instead of just copying and pasting a content snippet you want to reuse, you can simply save the content block and add it to other posts with a simple click.
If you are still wondering how you can make use of these blocks, following are some of the scenarios when a reusable block can help you work more efficiently:
- Adding ad banners in your WordPress posts and pages.
- Asking users to follow you on social media at the end of each article.
- For easily inserting call-to-action buttons or sections in posts.
- Quickly adding feedback forms to your pages
- Adding pre-designed forms and tables in your content.
How to Create Reusable Blocks?
Creating a reusable block is pretty simple. All content blocks can be individually saved as reusable blocks. So, to create reusable blocks, follow these steps:
1. Open the post or page editor in the WordPress admin interface
2. Once you create a new post, find the Add block button in the text editor. Click on that.
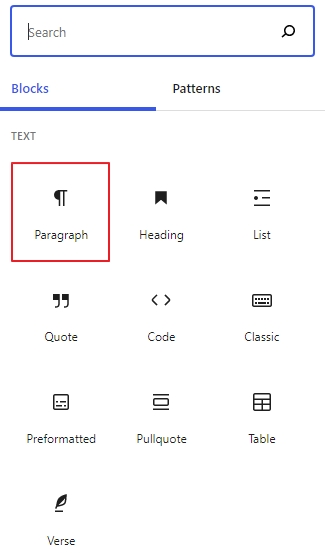
3. Scroll down the block list or search for “Paragraph,” or whatever type of block you want to make reusable. Here we are choosing the paragraph block.
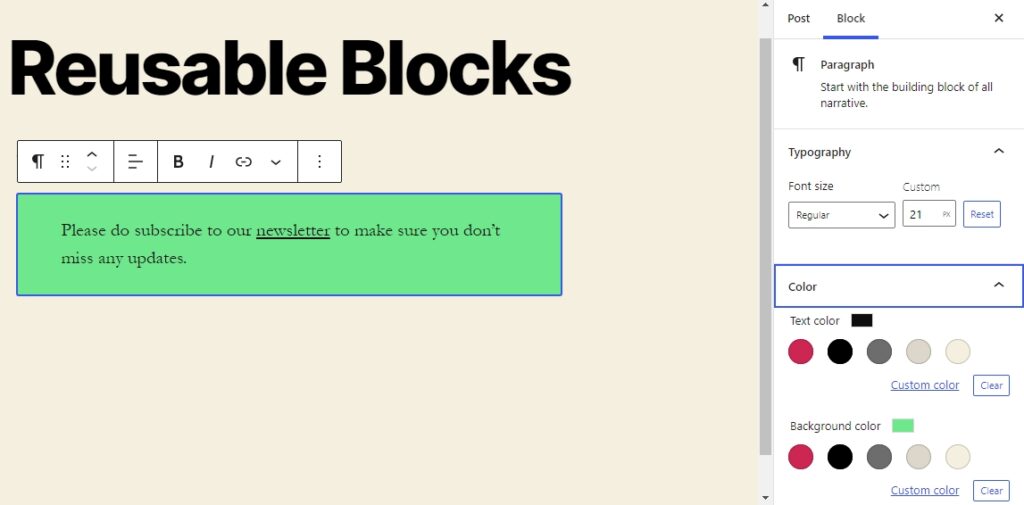
4. Design the block however you desire. You can use the styling and formatting options in the block toolbar and block settings.
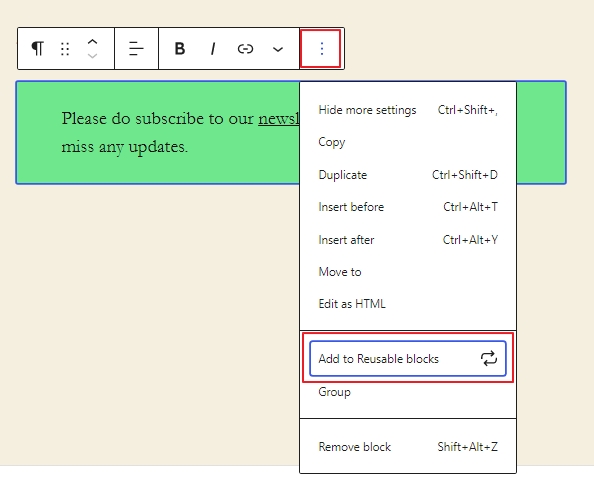
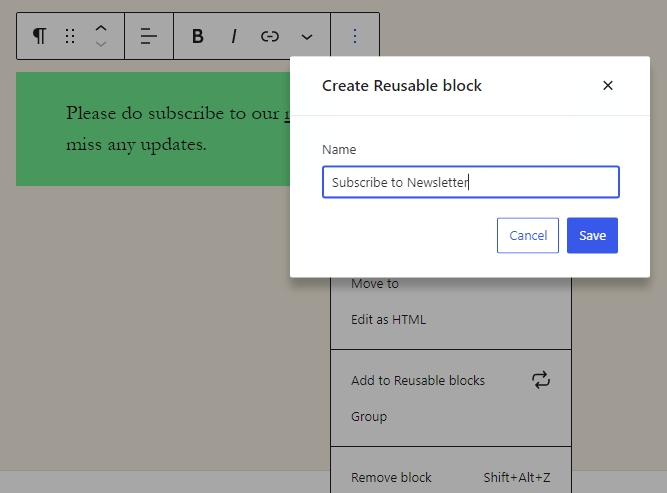
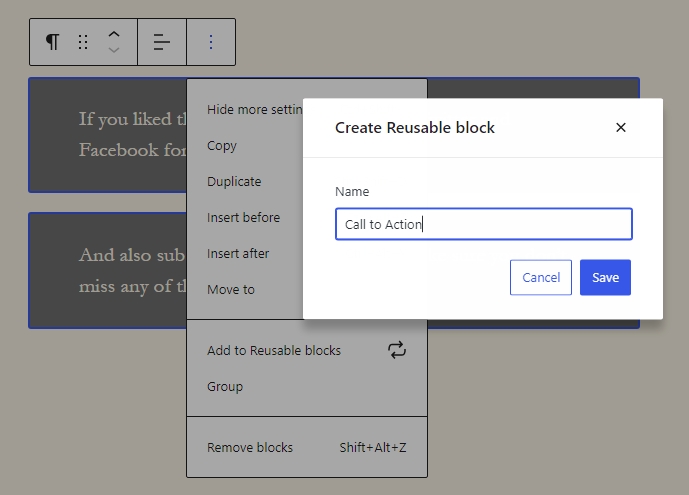
5. Click the more options menu (three dots) in the block toolbar and from the drop-down, click Add to Reusable Blocks.
7. Enter a name for the block from the Block Settings and then click Save.
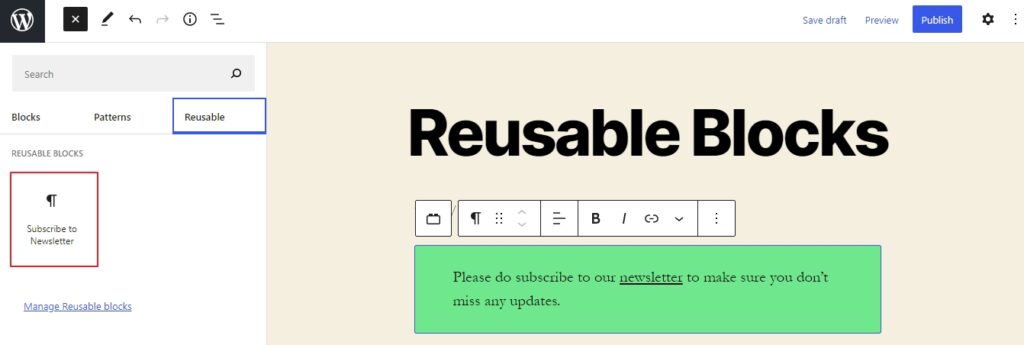
The block will now be available exactly as you have styled and named it. You will be able to find it under the Reusable category within the Search for Block interface.
Now if you need to save multiple blocks together, you can follow the below-mentioned steps:
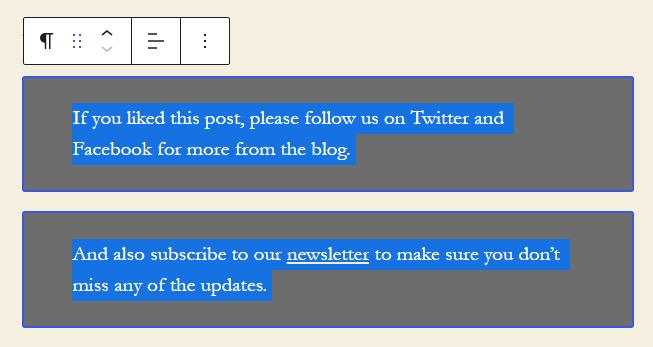
1. Select all the blocks you would like to save. There are two ways to select multiple blocks:
- Click-and-drag the mouse while holding the mouse button down
- You can select one block, then hold down the Shift key as you click on the other blocks you want to include in the group.
2. With the selected box, click on the three dots button. and choose the Add To Reusable Blocks option
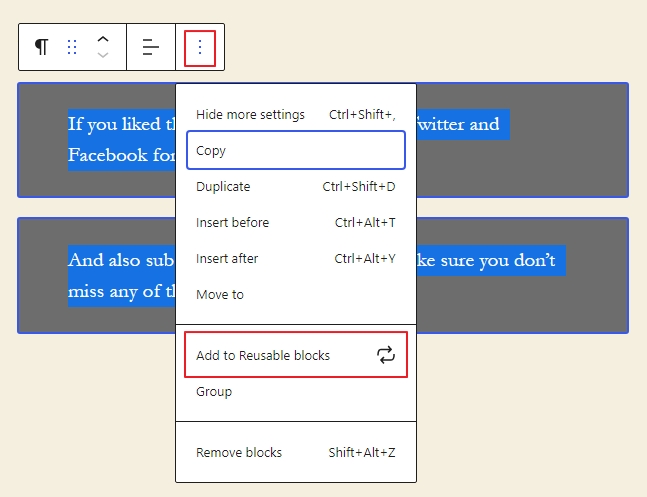
3. Name the reusable block from Block settings and then click Save button.
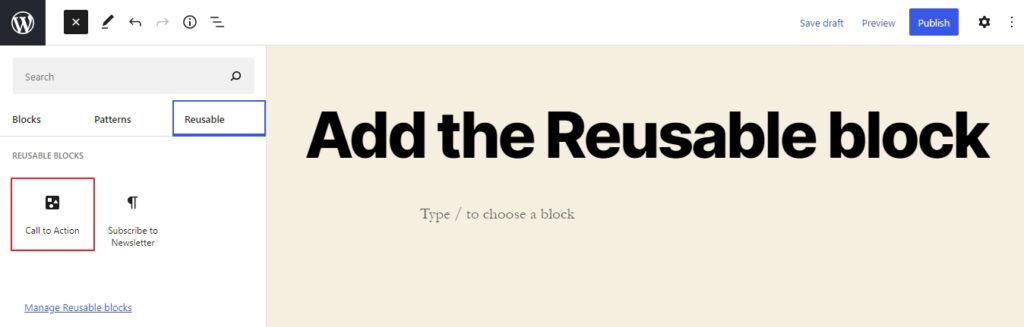
How to add the Reusable block to a new post?
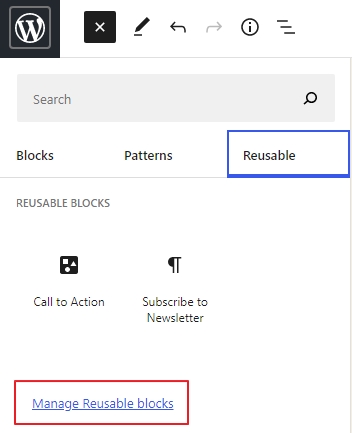
Now that we have discussed how to create a reusable block in WordPress, let’s learn how to add reusable blocks in your WordPress posts and pages. Once again create a new post or edit a post where you want to add the reusable block. On the post edit screen, click on the add new block button. Your reusable block is located under the ‘Reusable’ tab. You can also find it by typing its name in the search box. Or, you can use “/” to quick-insert reusable blocks without using the full interface. You can take your mouse over it to see a quick preview of the block. Go ahead and click on the block.
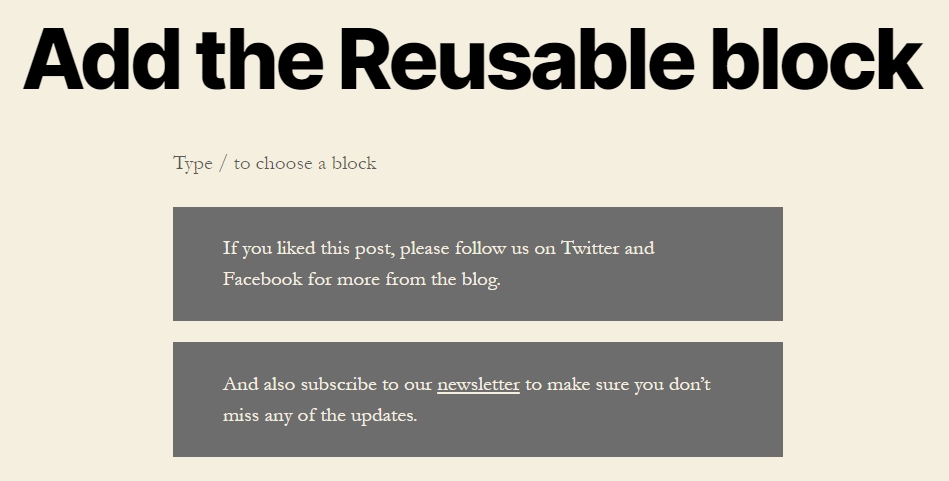
After selecting the reusable block, the block editor inserts a perfect copy of your previous design, so that you don’t have to write and design the call-to-action (or any design) for every single blog post.
How to Edit a Reusable Block?
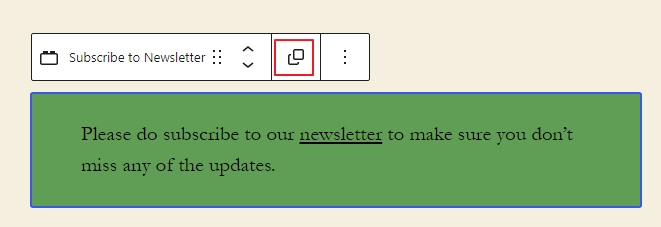
After adding your saved block to another post, you can also edit your reusable block. However, please keep in mind that changing a reusable block will change it in all locations where you have used it. If you do want to edit a reusable block for one post, you should convert it into a regular block.
For this, click on the ‘Convert to Regular Block’ option. This will convert the reusable block into a regular block just for that post. You can then edit this block without affecting the original reusable block and the other locations where it is used.
Managing all Reusable Blocks
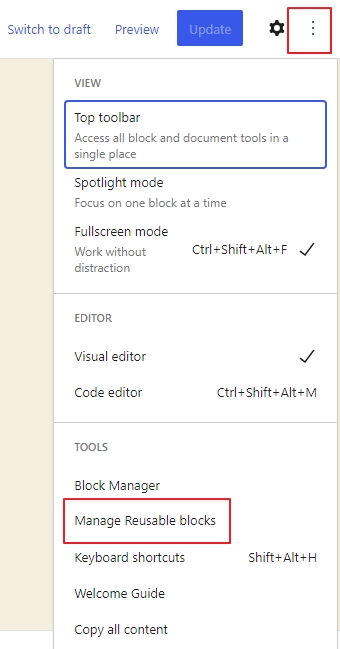
After using reusable blocks for a while, you may have some blocks that you don’t use anymore or some blocks that you want to rename. Gutenberg Editor allows you to easily manage all your reusable blocks from one screen. To manage your blocks, click on the add block button and then locate the Reusables tab and click ‘Manage reusable blocks’ link or you can alternatively click ‘Manage reusable blocks’ link from the more options menu (three-dots) in the Editor top bar.

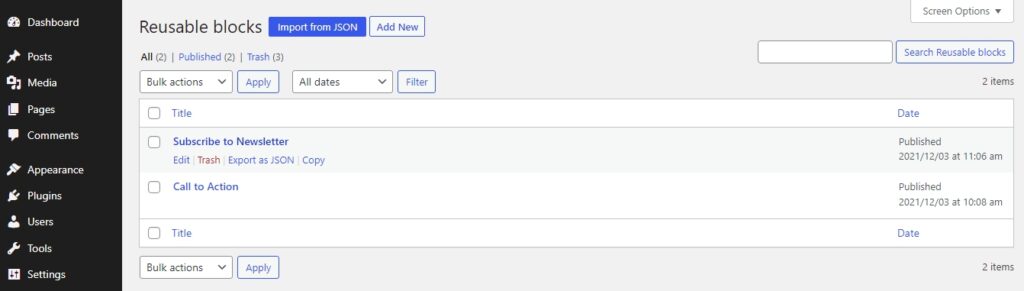
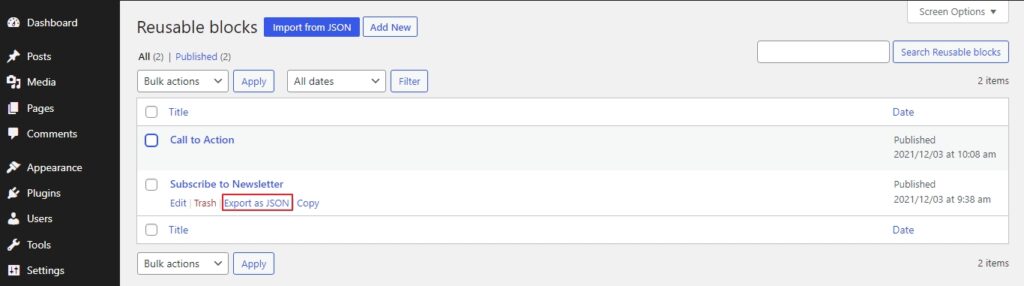
Clicking on the link will bring you to the block management page. From here, you can edit, delete, export, and import your blocks.
Also read: How to Customize WordPress Dashboard Easily
Exporting and Importing WordPress Reusable Blocks
An advantage of reusable blocks is that you’re not only limited to using them on the same website. You can also export the reusable blocks to insert them on some of your other websites. This is useful for web designers or anyone who manages multiple sites.
1. In the editor, select the “+” button towards the upper left side of the editor. It will show the list of blocks. Select the Reusable section.
2. Locate and click on the Manage Reusable Blocks link to move forward.
3. Click on the Export as JSON link under the reusable block you would like to export. This saves a JSON file to your computer.
5. Now log in to your other WordPress dashboard where you want to import the block. Again, go to the Blocks page using the same steps from before.
6. Select Import from JSON. This will show a file upload box. Click on the choose file button to select the block you downloaded earlier and then click on the import button.
That’s it. You’ve now transferred the reusable block to a completely different site!
Also read: Best Gutenberg Block Plugins
Conclusion
Using reusable blocks is very easy in Gutenberg and once you get used to it, you’ll make the most use of it. They are very useful to speed up your content creation process and standardize content across your site. Once you create a reusable block, you can easily insert it anywhere else on your site. We hope this article helped you learn more about reusable blocks and how to use them. If you have any questions or doubts regarding reusable blocks, feel free to ask them in the comments section below.