


While nations are at different points in their COVID-19 infection rates, it has led to the closure of educational institutions all across the World. Consequently, this has led to an increased demand for online teaching classes. Slowly but steadily, teachers and students are also getting comfortable with the online classes started by their institutions on account of the pandemic. This points to the fact that the face of education is changing with growing internet technologies and the web.
But we think you already know it, otherwise, why would you be here, right? Fortunately, WordPress makes it easy to create an online teaching website to share your knowledge with the world. There are various types of themes and plugins available, developed to offer users the strength to build and start online courses on their WordPress website.
In this tutorial, we are going to walk you step by step through the process of building your own online learning empire using the plugin Tutor LMS. It is a freemium LMS (Learning Management System) plugin that helps you create and launch your own online courses with WordPress. Now, let’s embark on the learning process!
Why do you need an online teaching Website?
An online teaching website can definitely contribute to the functioning of your educational organization (if you are a part of any), enhance the field of activity, expand the reputation and recognition of your institution amidst the students, teachers, parents, and the school administration. It will enable you to put out critical information on courses and schedules that are available, provide information on the educational qualifications of your faculty, and of course open up alternative learning opportunities such as online courses. Also, those who are not part of any educational institution can also start an online teaching site with WordPress if they want to share their skills and expertise with the world.
Whether you want to create an educational website for a school/college, university, educational websites for kids, sites for tutors, etc, WordPress is the ideal platform for you to start. With WordPress, you can get your educational website ready in an hour, if you follow this step by step guide.
Setting up your Educational Website
Before going to the steps, you need to know what kind of content/course you need to transmit through your website. A lot goes into the preparation of an online course such as the outline of the course, course restrictions, types of content, method of distribution, and so on. Most of the educational websites will have a home page, about page, details of the faculties, course details, contact form, etc. So, sit down and think about the elements you want to add to your teaching website you are about to create. Once you get a clear picture of your dream site, let’s start the process of bringing it into a reality.
Step 1: Set up a WordPress Website
Now, obviously the first step of creating an online teaching website is to set up a website with WordPress. It is important to choose a good hosting provider before you create any type of WordPress website.
Since here we are creating an educational site, we suggest managed hosting that will automatically deal with installs, backups, and updates for you.
Once you have created a basic WordPress website with a domain name and hosting provider, you are ready to customize so that you can turn it into an online teaching site. In this case, we will focus on finding the right theme for your educational website and installing plugins that will enable you to build online courses.
Also read: Best Managed WordPress Hosting Providers
Step 2: Installing and activating Tutor LMS
Now that your WordPress website is ready with its theme, the next step is to install and activate a Learning Management System (LMS) add-on. This will allow you to create your online course and add it to your website.
Primarily, you need to install and activate the Tutor LMS (developed by Themeum) plugin which is one of the most efficient LMS Plugin.
Tutor LMS comes with a drag & drop system to create resourceful courses. It has a user-friendly interface, unlimited customization, and plenty of options to set up your online teaching website. It has options for complete course management, lesson plans, quizzes, assignments, and more.
In order to install the plugin, login to your WordPress admin panel. Then, click on Plugins > Add New. After that, on the search bar type the name of the plugin, i.e Tutor LMS you want to install. Select the Install Now button to install the plugin. Finally, click on the Activate button to activate the plugin on your site.
For further details, refer to our guide on how to install a WordPress plugin. After completing the installation and activation process, it’s time to create your first online course.
Also read: Best WordPress LMS Plugins for E-Learning
Step 3: Creating a Course
In the first step, you will see the usual WordPress editor at the top, where you can include the course name, description, categories, and tags. While scrolling down, you will also see a few meta boxes where you can compose the entire course.
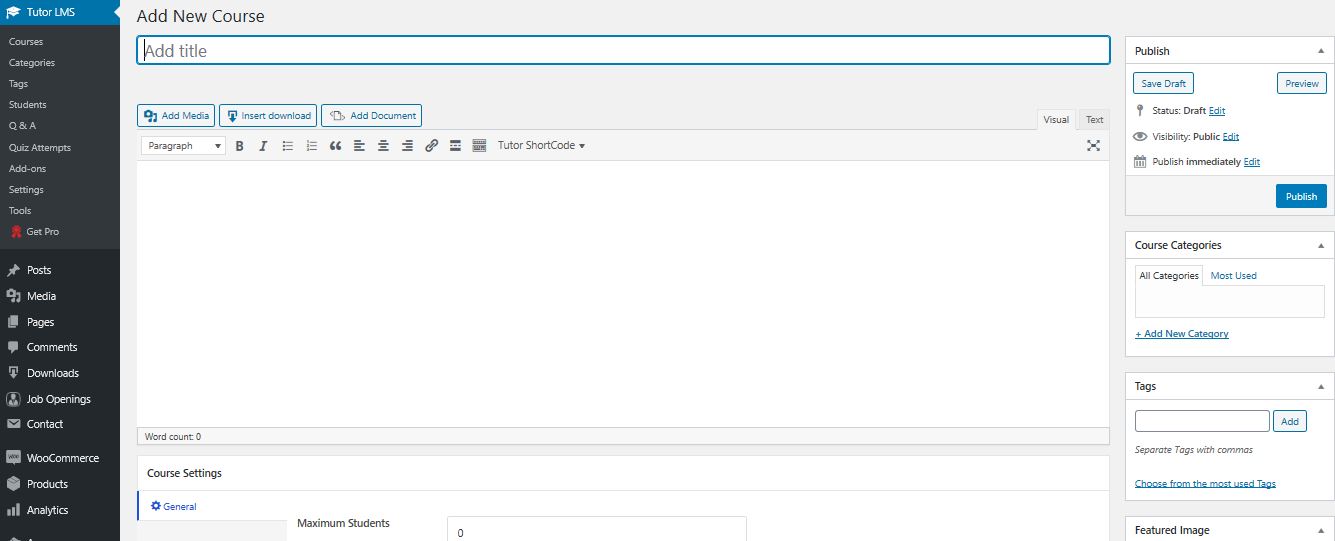
First, you can add topics that are from wide categories. Then, you can include lessons and questionnaires inside each topic.
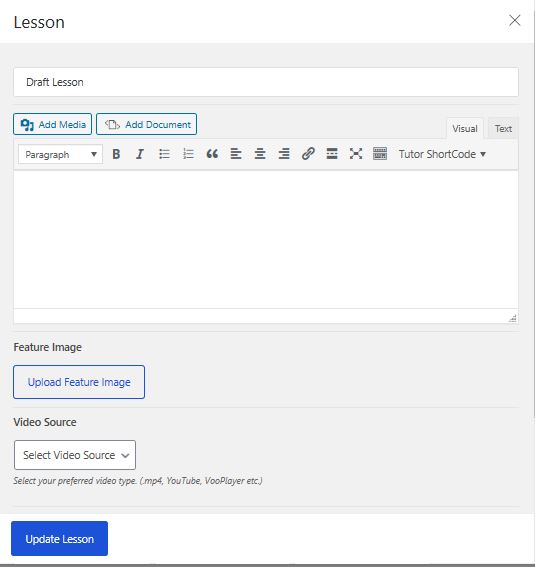
One useful feature here is that, when you click Add New Lesson, you will get a pop-up box with the editor for that lesson. To reorganize any of the course modules, you can use a drag and drop interface.
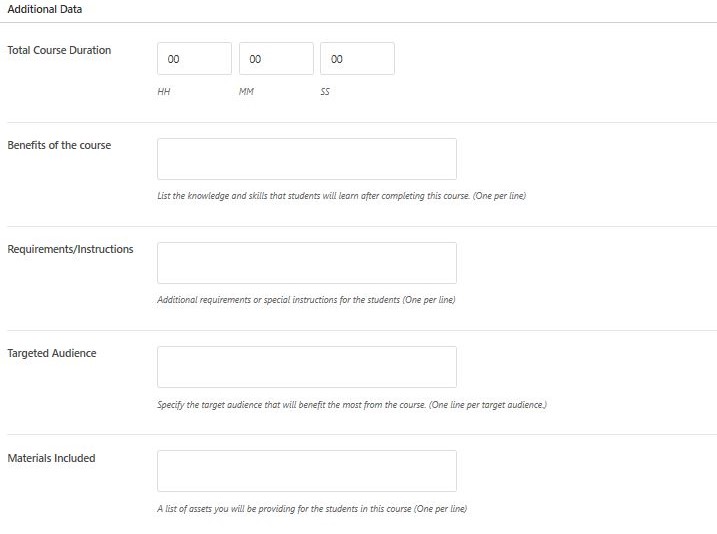
Below the course builder, you have the Additional Databox where you can adjust the duration of the course, add extra text for course benefits, target audience, requirements, etc.
Again when you scroll down, you will find the option to add an introduction video, either by uploading your own video or inserting a video from an external source such as YouTube.
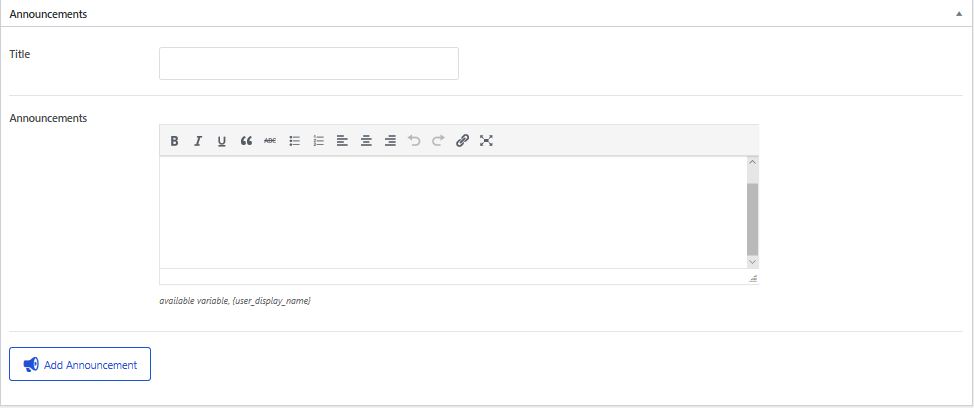
At the bottom, you can add course announcements which include an option to embed a variable to address each student by their name.
If you want to include other instructors, Tutor LMS gives you a dedicated Instructor interface. Instructors will then be able to create and manage their own courses from the back-end. With the premium version, they will be able to do this from the front-end of your site as well, while the free version needs them to use the WordPress back-end.
There are also many options to manage students, Question and answer sections, quiz attempts, etc. The management options aren’t fully advanced in the free version, but you get more in the premium version.
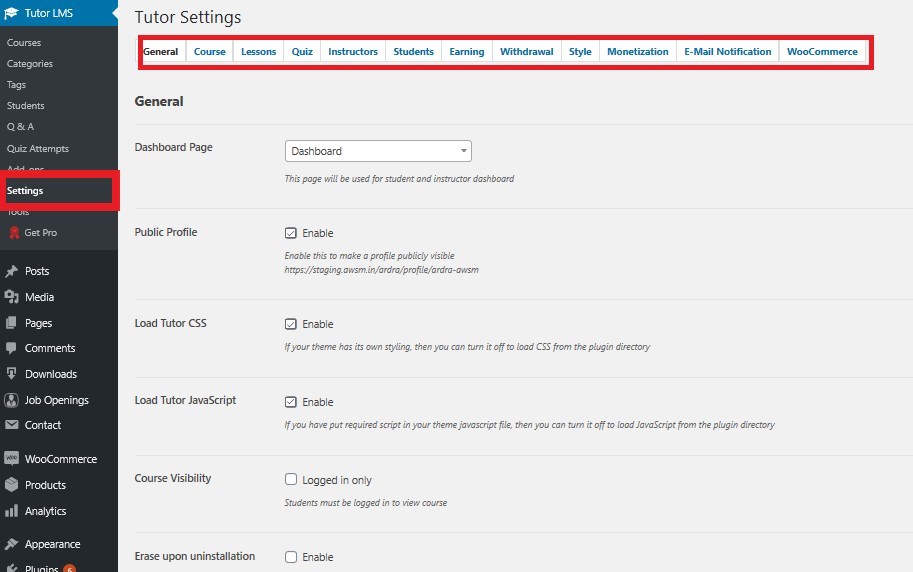
To change other features of your teaching website, you can utilize the Settings area. Here, you will get a group of tabs to regulate the important functionalities of the site. You get a lot of alternatives for arranging the default class settings as well as the instructor’s behavior.
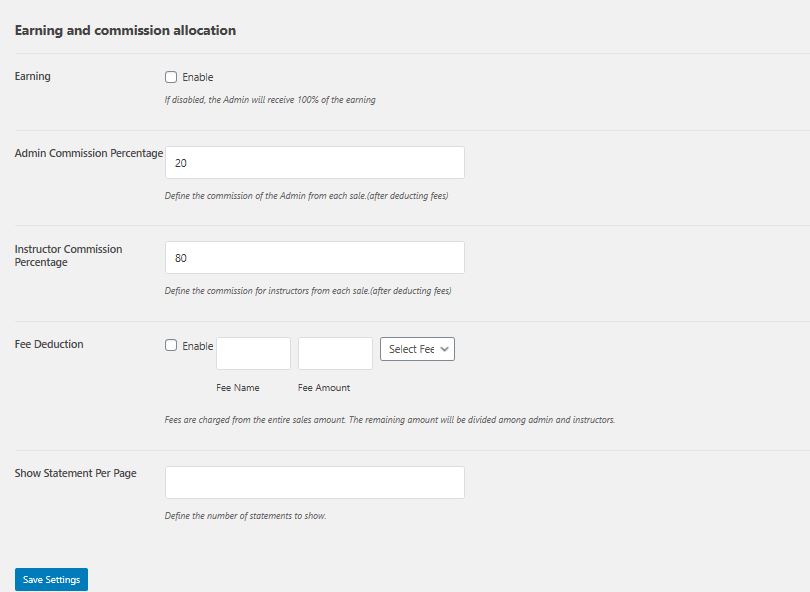
Also, it offers the salary and payment options in the earning tab. You can choose whether or not to pay the instructor a commission for their work, including many options for setting up how that works.
Apart from these, there are many other options you get with the free version of Tutor LMS which you can try on your own. You can surely create online courses without the need to pay for the premium version of the plugin. Without much custom styling on your own part, you will be able to build courses that provide your students with a great learning experience.
Step 4: Selecting the perfect Educational theme
An ideal educational WordPress theme should have the basic features that enable you to set up complex websites with ease. While creating an educational site on WordPress, it is always better to select a theme that is designed with learning in mind, so that it will be easier to include the options your site requires. In other words, go for a theme that offers you a strong framework, templates for all the pages, advanced features, etc for building an educational website.
There are many education WordPress themes out there. However, a free WordPress education theme is the best choice to get started, especially if your budget is limited. And the best part about these free themes is that they all have a beautiful and responsive design, paired with the right features required to create a professional website for your institution.
For example, Astra is one of the most popular WordPress multipurpose themes that can be used for creating a teaching website. It comes with several starters and demo websites, including template designs for your education site. The theme is lightweight and customizable with WordPress page builders. Another theme that is best suited for the same is Education Base which is a fully responsive free theme. It has a number of customization options that make it easy to incorporate your brand and style. You can upload your own logo, change colors as well as fonts, add numerous widgets to your homepage, and more. The homepage has a sensible layout with a full-width header that’s perfect for featuring your university or school.
Apart from these themes, the company behind Tutor LMS, Themeum also offers a massive collection of Premium WordPress themes such as Edumax, Language School, etc. Using these themes you can create advanced online educational websites like Udemy, Chegg Tutors, etc
Also read: Best Multipurpose WordPress Themes
Step 5: Installing and Activating the theme
Once you have chosen the appropriate theme for your website, the next step is to install and activate it. First, log in to the WordPress Dashboard http://yourwebsitename.com/wp-admin.Then, go to Appearance > Themes. Select the Add New button at the top. We can install WordPress themes by three methods – directly from the WordPress Repository (for free themes only), by the Upload Method or using FTP. To know more about the different methods of installing a theme, click here.
Most of the educational websites will have a logo of their own. So if you want to add your own Logo, go to Theme Option Panel > General Settings and upload the logo, favicon, background image for your website. Further, add the contact details and save it.
Conclusion
We believe this article helped you to easily create a blooming online teaching website in WordPress. If you have in-depth knowledge of a particular subject, a love of learning and a desire to make a difference in the lives of young people, we definitely believe that now is the right time to step into the world of online teaching. There are many other platforms and e-learning plugins that can make the process of setting up an online teaching website simpler. And as you might’ve figured out, we think WordPress is the best one for smaller institutions or beginners.