


Online surveys and quizzes are a fun way to increase user engagement on your site. It makes your site more interactive and even solicits valuable feedback from your visitors. You can see how readers respond to certain questions, and you can find out what they do or do not enjoy about your site.
Viral quizzes are a great tool to generate traffic. They could help you collect valuable data & generate leads too. With surveys, you can improve brand loyalty with customer service, and get to know your audience better. It doesn’t have to be lengthy surveys with a lot of questions, sometimes you can just ask “did you enjoy our product” or “rate your experience with us”. You don’t even need to ask questions about things that relate directly to your site, as long as your questions are connecting with people and building a community around your core objectives.
In this article, we will show you how to easily create an online survey or quiz in WordPress using the Crowdsignal plugin.

Step 1: Download and Install CrowdSignal Plugin
The first step to creating a survey in WordPress is to download the CrowdSignal Plugin to your WordPress website, Install and Activate it.
Step 2: Logging into Crowd Crowdsignal Account
To log in to Crowdsignal.com, you need to use your WordPress.com account. If you don’t have a WordPress.com account, you’ll need to create one. If you already have a WordPress.com account, on the Crowdsignal login page, enter the email address or username associated with your WordPress.com account and click Continue. Then enter your WordPress.com password, and click ‘Login’.
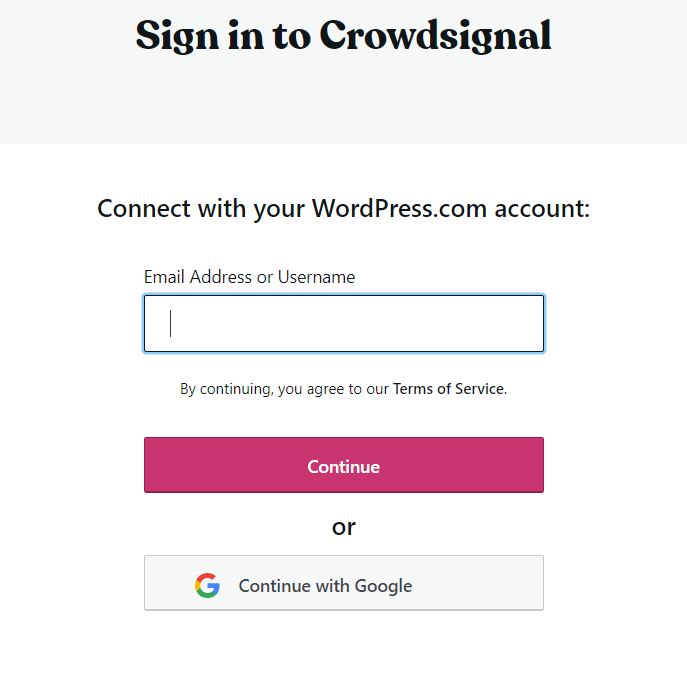
After you have logged into WordPress.com, you will be asked to authorize Crowdsignal to use your WordPress.com account. Once you click ‘Approve’, you will be returned to Crowdsignal.com where you will be signed in.
Step 3: Create a Survey
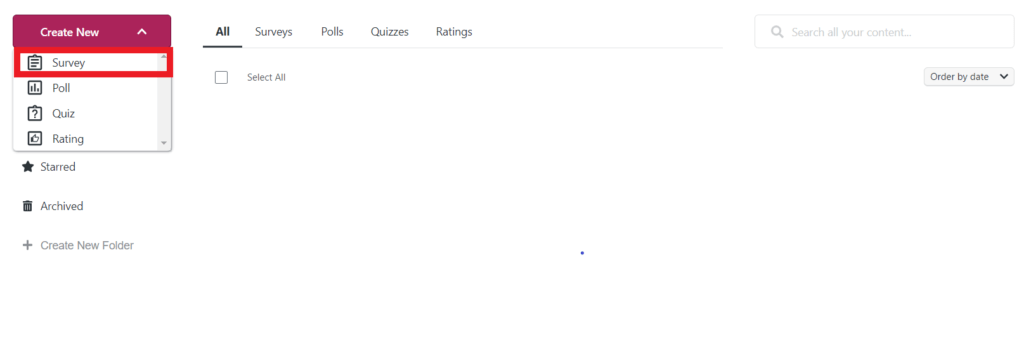
Once you sign into the crowd signal, the home page will appear. Go to the Dashboard> Create New> Survey. Give your survey a name. Note that when your survey’s URL is created, it will include the title you choose.
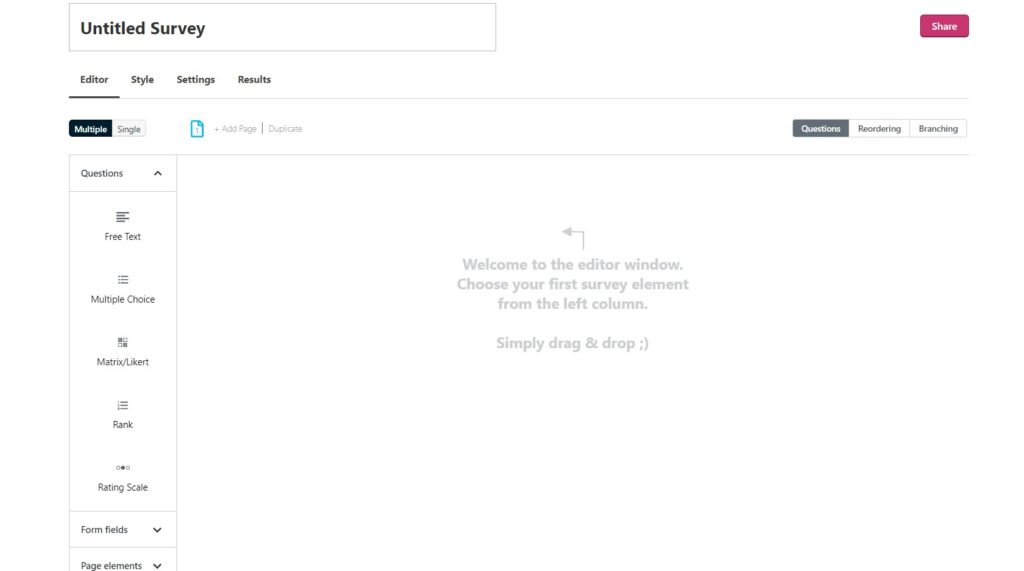
Editor Section
Under the survey name, you can see the Editor section where you add questions and other elements to your survey. The types of questions provided by Crowdsignal are free text, multiple-choice, rank questions and rating scale questions.
To add any type of questions to the survey, drag it from the column on the left to the survey window on the right, and then enter the question.
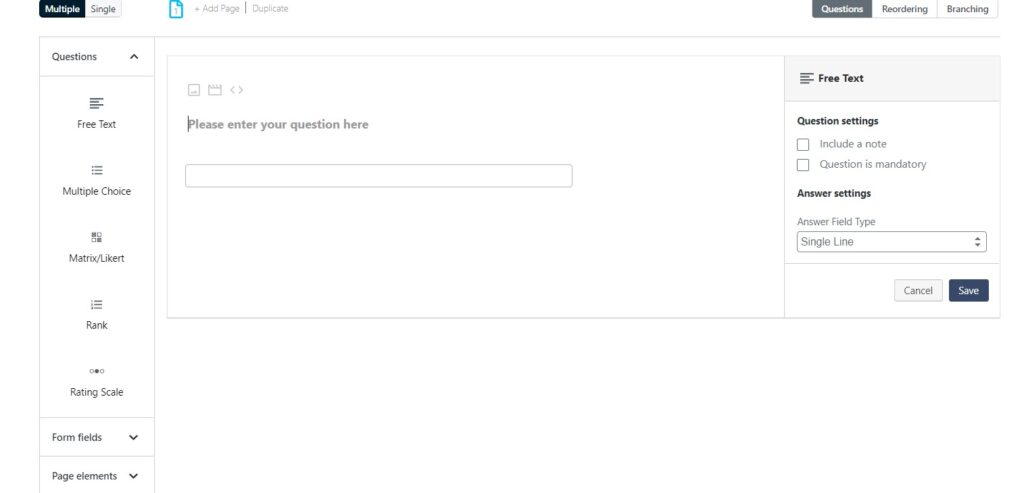
You can drag and drop questions into any position on the page. Once you have added your questions, you can reorder them by clicking the ‘Reordering’ tab at the top right, then dragging the questions into your chosen order. Crowd signal also provides different kinds of form fields such as Name, Email Address, Telephone Number etc.
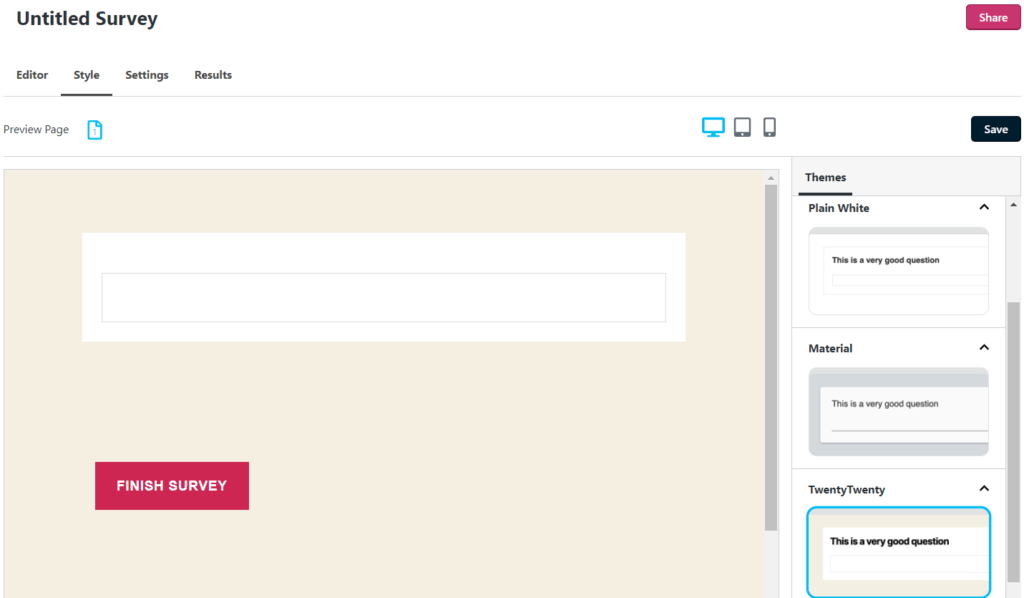
Style Section
The Style tab lets you choose and preview a theme for your survey, or create your own custom theme. Select a theme from the options on the right, and click personalize to select some basic options for the theme. The Preview box will display your survey according to the selected options. You can also click the device icons to preview how the survey will display on desktop, tablet, and mobile devices. Once you are satisfied with the preview, click Save to save your style settings.
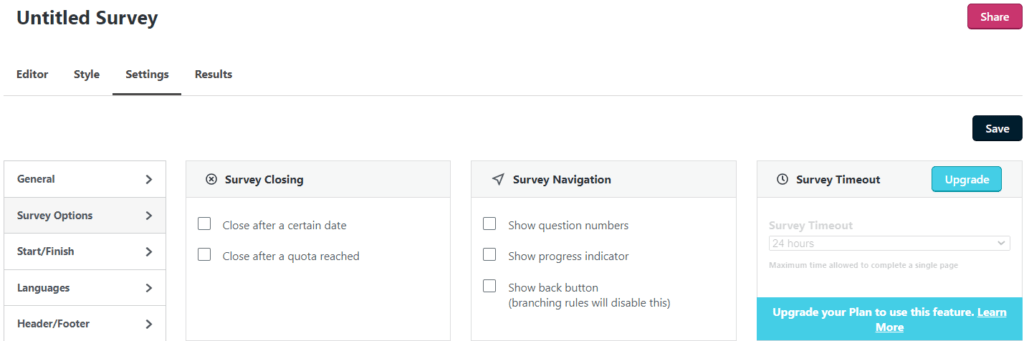
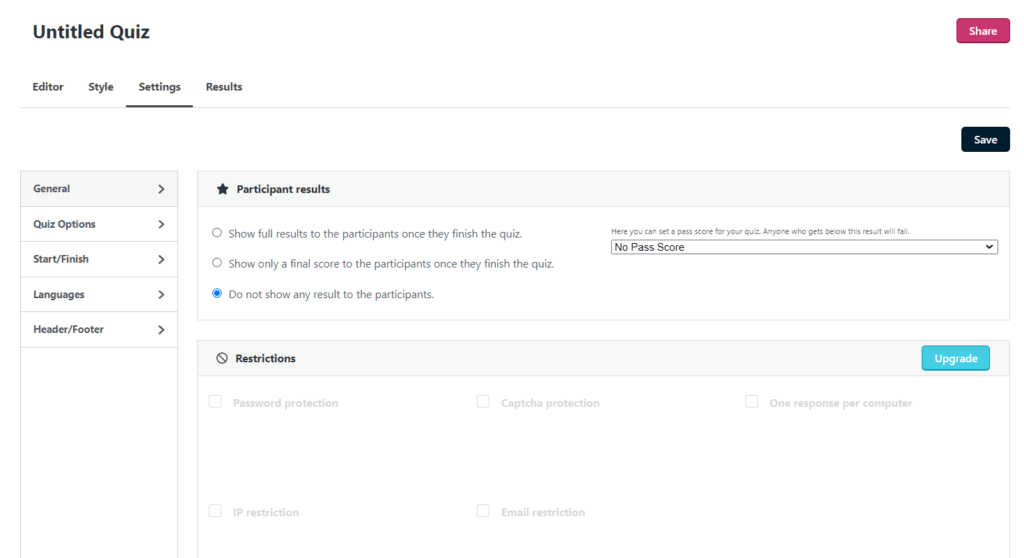
Settings Section
The Settings section lets you configure how your survey works. You’ll see 5 tabs in the left sidebar of the Settings section: General, Survey Options, Start/Finish, Languages, Header/Footer. You can change the URL of your survey, place restrictions on your survey, enable password and captcha protection, etc using the settings menu.
After completing all the steps, now is the time to display or share your survey with the viewers. Crowdsignal offers many ways to share your survey on the Sharing page. You can copy the direct link to share with others, Post a link to it on Twitter or Facebook, embed the survey into your website etc.
How to create a Quiz?
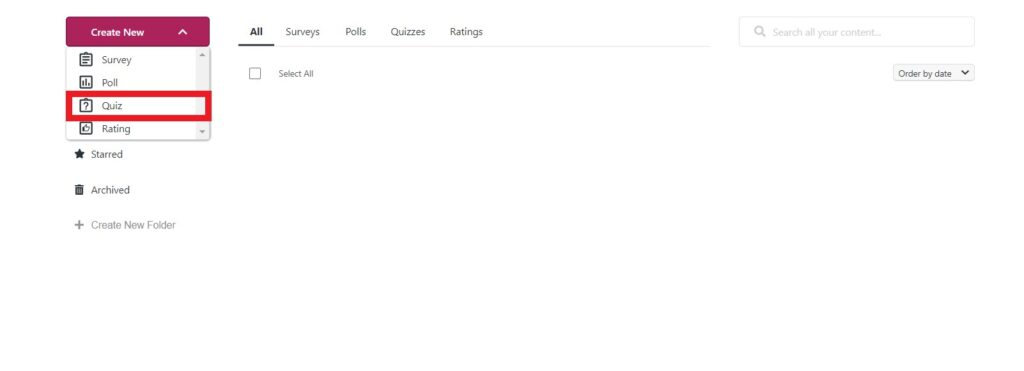
The steps remain almost the same for making Quizzes, Exams, and Polls with just minor adjustments. However, let’s see how to create your first WordPress quiz. Once you have logged in to your Crowdsignal account, Click the Create New drop-down list and select Quiz. Give your quiz a name.
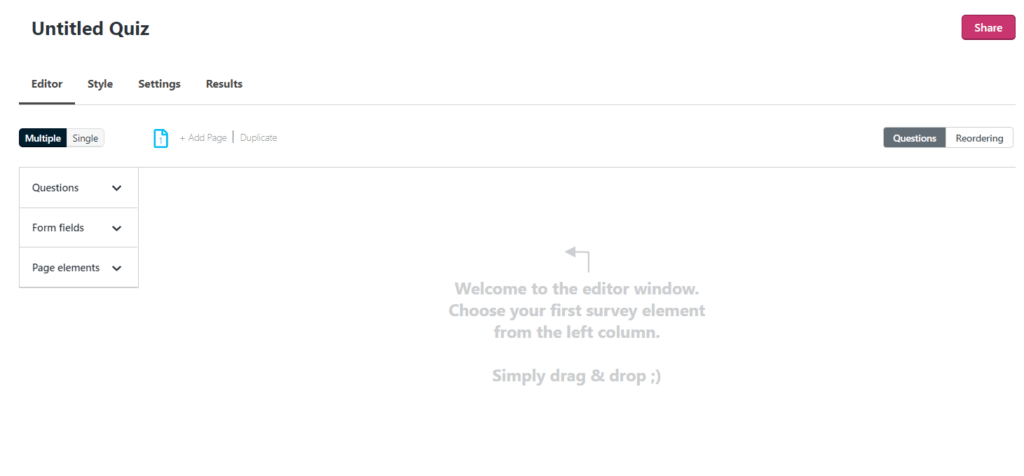
In the Editor section, click and drag quiz elements from the column on the left to the quiz area on the right.
Using Crowdsignal, you can create quizzes using multiple-choice questions, form fields such as name, address, email id, URL, etc. Remember to click Save after adding each quiz element. You can also choose a style and configure the settings for your quiz using the style and settings option respectively.
Just like in surveys, in quiz also you can edit the permalink from the settings menu. In the Permalink box, you will see the URL of your quiz. This is generated automatically from the title of your quiz, but you can edit it here by clicking ‘Edit’ if you want to change it. Note that editing the permalink here does not change the survey title. You can change the title in the Editor section.
You can also manage how the results are displayed (or not) to your participants, several ways to restrict the participants (password protection, IP restriction, Captcha protection), etc.
Once you are done with customizing your quiz, you can share it with your users by posting a link to your quiz on Twitter or Facebook, embed it into your website.
We believe this article helped you add a quiz and survey to your WordPress site. Hope you like it and tell us what you made out of this amazing plugin. Also, don’t forget to subscribe to our newsletter for more WordPress updates.
Disclosure: This post may contain affiliate links, which means we may receive a commission if you click a link and purchase something that we shared. Read more about Affiliate disclosure here.