


Beautiful layout, transitions, and color tones, but if one line of content goes awry, all the hard work and effort you put into it will bite the dust. Without the content, it is impossible to communicate to the audience, and having content is not enough.
Making sure they are correctly displayed on all the pages is vital. Now, if you are wondering how to ensure that all the content is shown correctly, then you need to know your way around the “LOOP” in WordPress. The loop is an integral part of WordPress that plays a crucial role in displaying all the content correctly.
We will explore what loop in WordPress means and how important it is.
What Exactly is the WordPress Loop?
The loop in WordPress is a PHP code responsible for displaying dynamic content on web pages. It can be any page, the homepage or even a blog page, posts, custom post types, and so on. It works behind the scenes to display the content properly. As the name suggests, the code will loop over and over till it has found the relevant content to be shown, and it will repeat itself to the point until all the content has been displayed.
The loop is only applicable to classic themes and not to the new block themes.
If the loop is not present behind the scenes, then displaying content on the web pages will be impossible for classic themes. The loop facilitates the database query for showing the content. It also determines the formatting option based on the instructions inside the theme files.
The loop in WordPress exists in the PHP template files that are a part of the WordPress template hierarchy. If you have ever wondered how various themes display content differently, making them unique and stand apart from others, it is through the loop.
Importance of the Loop in WordPress
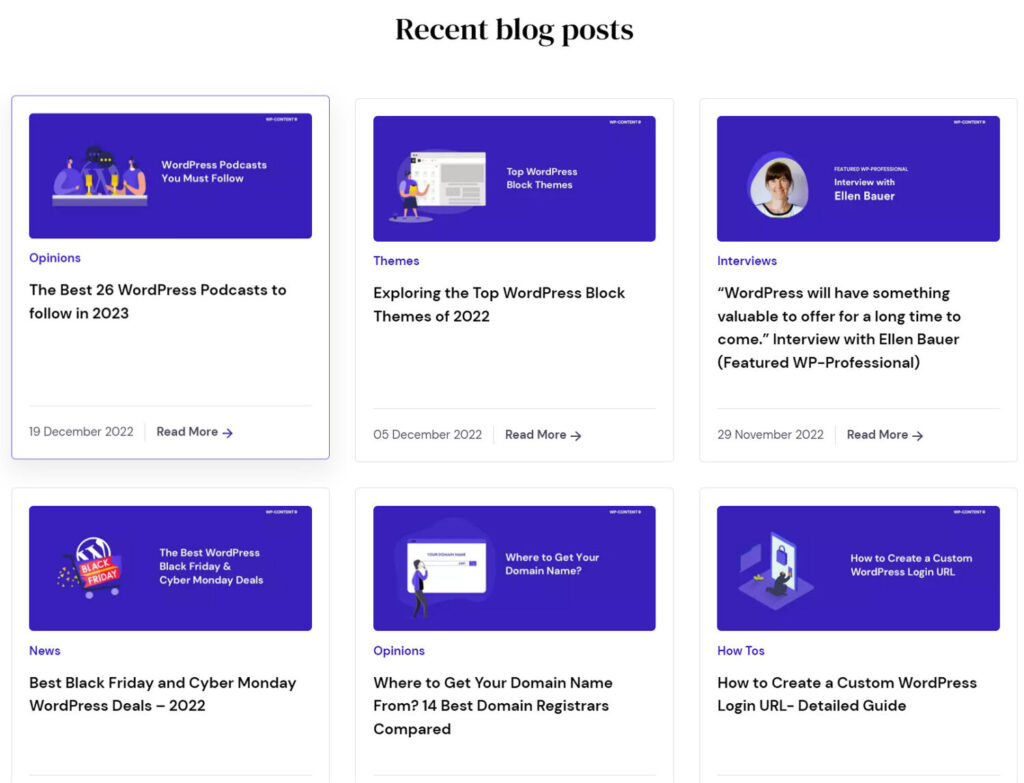
Take a look at the above image. Everything makes sense to the site’s visitors. The various sections, headings, dates, and categories are in the correct place. What if the headings weren’t aligned with the topic it is supposed to represent? How does WordPress know which piece of content goes where and so on?
This is where the loop steps in. It facilitates the proper display of content, be it any form of media. With the loop, the theme authors can decide how to display the content by editing how the code executes.
Also read: How to Add Custom CSS to WordPress Easily
What Does the Loop in WordPress Display
Now that we know that the loop is used for displaying content, what all elements can it output? It can be used to output template tags as well as conditional tags. We will be mentioning only a few of the template and conditional tags for now.
The template tags:
- the_time()
- the_title()
- the_author()
- the_category()
- the_excerpt
The conditional tags:
- is_page()
- is_admin()
- is_404()
- is_author()
- is_tag()
The Structure of the Loop in WordPress
Before diving deeper into the various parts, we need to know the basic structure. This is what a loop in WordPress looks like:
if ( have_posts() ) :
	while ( have_posts() ) :
		the_post();

	// your post content here

	endwhile;
endif;
It can also be written differently, but the function remains the same:
if ( have_posts() ) {
	while ( have_posts() ) {
		the_post();

		// your post content here

	} // end while
} // end if
There are mainly six main divisions. We will explain it in a straightforward way to get you on board.
- if ( have_posts() ) : – The loop starts with an if statement. An if statement is based on true or false. If a condition is met (true) do this as the next course of action, if a condition is not met (false) do another action. Here, it checks if there are any posts to display.
- while ( have_posts() ) : – Once the if function finds a set of posts, the condition is met (true), this is where the loop starts and all the magic happens. This is a PHP while-loop and will keep repeating until there is no more content to be displayed.
- the_post(); – This code is what accumulates and orders all the content (post) to be displayed. It runs till all the content has been fetched and lined up.
- // your post content here – This section is a combination of PHP with HTML. This is where we have the freedom to determine how to show the content that has been fetched by writing the code.
- endwhile; – The loop needs to end once it has fetched all the content and done its job. This line marks the closure of the loop.
- endif; – This line closes the if statement.
Where is the Loop in WordPress Located?
Now that we have gone through the overall structure where can we get to see one? The loop can be seen in the template files of your theme. You can also find it in template parts, depending on the theme.
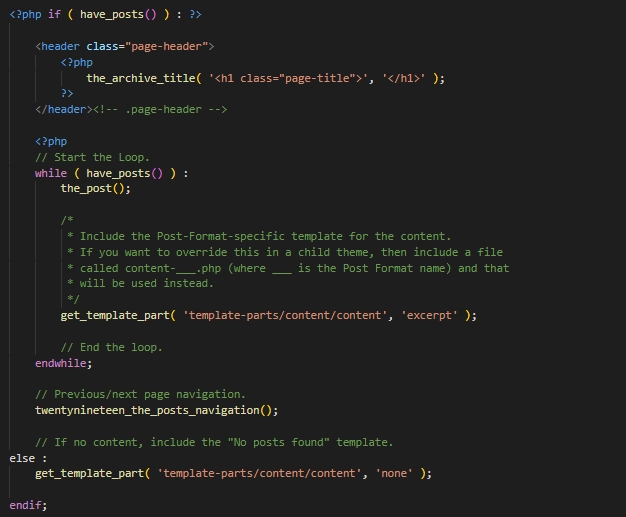
If we take a look at the archive.php file of the twenty-nineteen theme, it will look like this:
Now. let’s take a look at what is happening here.
if ( have_posts() ) :
Checking to see If there are any posts available.
<header class="page-header">
	<?php
	    the_archive_title( '<h1 class="page-title">', '</h1>' );
	?>
</header><!-- .page-header -->

<?php
This part handles the heading of each post to be displayed, once the if ( have_posts() ) : is true.
the_archive_title();
This function displays the archive title based on the query.
while ( have_posts() ) :
This is where the loop starts. If the have_posts() is true, the loop will start and execute till all the posts are displayed.
the_post();
Prepares the next post to be displayed accordingly.
get_template_part();
This function loads a template part into a template which requires the slug name for the generic template as the first parameter and the optional name of the specialized template as the second parameter. This is what determines how the content will be displayed to the users. The reason why theme authors use the get_template_part() and call a different file, is to prevent writing the same code over and over again.
endwhile;
Ends the loop
else :
If there are no posts, the given template will display. Here, the get_template_part() calls forth another file located in the specified template-parts folder to perform the action if no post is found to be displayed.
endif;
Ends the if condition.
How to Write a Custom Loop in WordPress
if ( have_posts() ):
    while ( have_posts() ):
		the_post();

		the_permalink();
	    get_the_title();
	    the_time();
	    the_author();
		the_post_thumbnail();
	endwhile;
endif;
Now, this is a custom code and we have kept it simple for the time being. The section that interests us is the one between the_post(); and endwhile; . This determines how the retrieved content will be displayed to the users. The theme authors have full control here, able to manipulate how a post is displayed by adding more tags.
Here, what the code does is this:
- the_permalink(); displays the permalink of the fetched post.
- get_the_title(); – Shows the title of the post
- the_time(); Shows either the time or the date
- the_author(); Outputs the author’s name
- the_post_thumbnail(); displays the thumbnail
Now, what will be displayed is totally under our control, as the tags we insert determines it.
How do the Block Themes Display the Content?
Now the loop is a great way to output the content the way you want it to be as long as you know how to code. But what about users who are not so much into coding? This is where the new WordPress block themes and the query loop come into play. Remember how we discussed how only classic themes need to use the loop to display the content? The block themes can display the content without it.
The Query loop block was introduced with WordPress 5.8. This advanced block allows us to output content without writing a PHP loop. This block makes use of block patterns that are customizable. This block will take care of the coding side and there is no need for us to enter the code manually. This is a dynamic block, meaning all the changes we make, like adding or removing content, will get updated automatically. With this block, we can display pages and posts or even use them for custom post types.
The block can be used to display recent posts, we can also use the block to show post that belongs to the same category or have the same tags, create a portfolio page, and more.
The block can be added to posts and pages. To add this block to a post, do this- type /query loop.
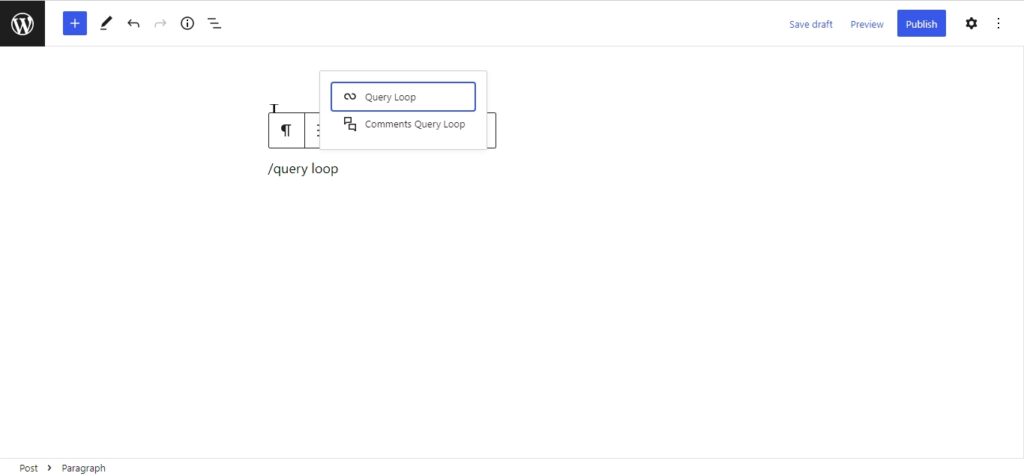
You can also select the block from the left side menu by clicking on the ” + “
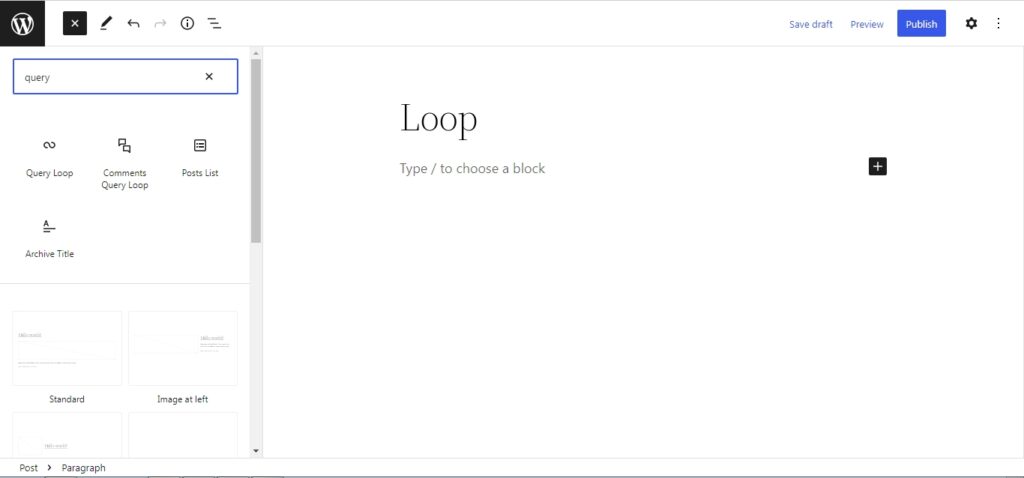
One can start blank or choose from the predefined blocks available.
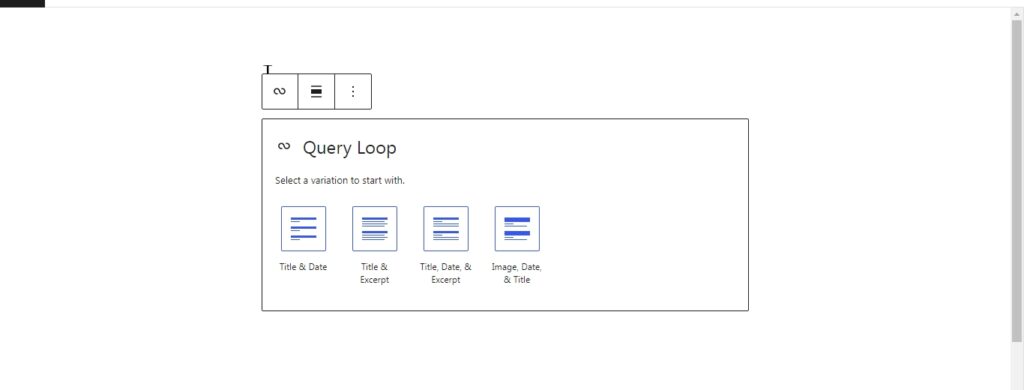
If you decide to go with the preset ones, look at the available patterns and chose the one that suits your need:

Once selected, you have a wide range of options to modify the block. Options to change the alignment, width, colors, items per page, list or grid view, and many more.
Also read: WordPress Block Themes for Full Site Editing
Wrapping Up
Knowing how the loop operates in WordPress is a great way to understand how each theme outputs the data. It can also help you if you decide to write your own theme one day.